현재 사용 중인 언어로는 이 페이지를 사용할 수 없습니다. Google Translate을 사용하여
자동 번역된 페이지
를 볼 수 있습니다. Renishaw에게는 이 서비스를 제공할 책임이 없으며 번역 결과를 저희가 확인하지도 않았습니다.
추가로 도움이 필요하시면
저희에게 연락해 주십시오.
Laser calibration reduces costs and gives four-fold accuracy improvement for CNC water-jet cutting machine manufacturer
PTV uses Renishaw's ML10 laser interferometer measurement system and QC10 ballbar, to reduce manufacturing costs and increase machine accuracy by a factor of four.
Precision water cutting has a huge number of applications, and particular advantages over traditional CNC machine tools in processing high specification metals, composites and other media. Thin, flexible or sensitive materials, such as rubber, plastics and even paper, are especially difficult to ‘machine' using traditional methods. In these cases water cutting offers many of the advantages of laser cutting machines, but at a lower cost.
In the cutting process, the water is compressed to a pressure of over 4000 bar, then directed through specially designed nozzles. For certain materials and for high-speed grinding, water is mixed with natural garnet abrasive prior to cutting.
PTV manufactures one design of machine, but is able to vary the X and Y dimensions over a large range, according to customer needs. In effect, every machine is customised - PTV engineers can easily adapt machine components to different requirements, both in initial construction in Prague, and during installation at a customer's site.
The PTV machine was designed in 2002, originally with a magnetic linear encoder system and a MEFI CNC control. Initially there were problems with maintaining the precise separation required between encoder and readhead, particularly over distances greater than 6 metres. There were also dynamic problems in achieving the required machine accuracy, due to the lightweight aluminium structures for the X-axis and Y-axis. PTV therefore sought advice from MEFI, who suggested using a laser interferometer to identify the causes of these inaccuracies.
Renishaw's solution
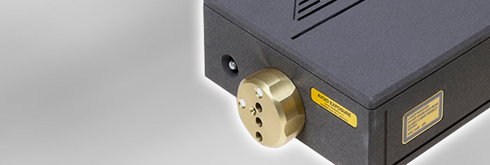
PTV searched the Internet and, from a short list of possible systems, reviewed Renishaw's ML10 laser interferometer measurement system. Explained Jan Kunert, CNC engineer, “We visited one of our customers, where a Renishaw engineer demonstrated the ML10 system to us. We realised that not only could we use it to identify the dynamic errors, but we could also use it to map errors during machine production. We were only looking for someone to do a one-off study of our machines, as a sub-contract service, but very quickly knew that we had to have a system ourselves. In fact, the system we bought is now used so extensively, both in the factory and during on-site installation, that we intend to buy another.”

Linear accuracy improved from 0.2 mm to 0.05 mm per metre
PTV removed the magnetic linear encoders from the original design, instead taking positional feedback from the rotary encoders integrated onto the drive motors. These encoders had always been there, but had been thought to provide inaccurate feedback, due to the variable distance and the resulting effects from the twisting of the ball-screw.
This is where the Renishaw ML10 laser interferometer measurement system and Laser10 software proves its worth. The system's laser optics are mounted onto the structure of the finished machine and readings taken at every 20 mm of axis movement. This is compared to the value provided by the machine's rotary encoder, which is at least always repeatable, to generate a compensation value for that specific position.
The positioning uncertainty on the original design could be up to 0.2 mm per metre. Jan Kunert now knows that accuracy is always better than 0.05 mm per metre and provides customers with a certificate from Renishaw's Laser10 software to prove it.
Proving quality through international standards
The ML10 laser interferometer measurement system is a reference standard on which PTV relies, using the highly stable wavelength of laser light, to provide performance verification to ISO 230-6 and traceability of the measurements in line with their ISO9001 certified systems. PTV sees both these factors as crucial in winning new customers, especially in markets where it is unknown.

Combining Renishaw solutions for maximum efficiency
In addition to the compensation provided by the ML10 laser interferometer for linear positioning, there are a series of other machine characteristics which PTV checks and adjusts through the use of a ten-minute test with a Renishaw QC10 ballbar. During the test the water cutting machine is instructed to describe a circular path in the X-Y axis, with the QC10 ballbar coupled to the machine on special magnetic mounts. Any variation from the normal test circle radius is picked up by the ballbar's highly sensitive transducer and data fed back to a PC running Renishaw's Ballbar5 analysis software. This immediately provides exact error values for 21 different machine characteristics.
Rapid increase in business
The future is looking bright for PTV. After long experience in this field, distributing machines from the U.S, it is now selling an increasing number of its own machines. Its largest customer, V.S.M.P.O. in Russia, already has six machines and has ordered a special 5-axis machine, which it will use to cut titanium for military and aerospace applications. PTV is also building a new factory, with an increased area for production and new demonstration facilities.
