Schemi del processo produttivo
Il processo produttivo Pyramid™ Renishaw trasforma tecnologie innovative, metodi affidabili ed esperienza consolidata in strumenti capaci di identificare e controllare le variazioni all'interno della fabbrica.
Schemi del processo produttivo
-
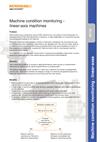 Educational article: (AP100) Productive Process Pattern: Machine condition monitoring - linear axes [en]
When machining a component using a CNC machine tool, the quality of the finished part, for example surface finish and adherence to tolerance, is highly dependent on the positioning and contouring performance of the machine. To maintain machine performance, use a telescoping ballbar to conduct a rapid performance check as part of a preventative maintenance regime, before machine performance is compromised.
[606kB] -
 Educational article: (AP010) Productive Process Pattern: Productive Process Patterns™ [en]
Introduction to the Productive Process Patterns™ - solutions for intelligent process control within manufacturing
[598kB] -
 Educational article: (AP101) Productive Process Pattern: Machine condition monitoring - multi-axis [en]
Productive Process Pattern™ from the foundation layer of the Productive Process Pyramid™. Use a workpiece inspection probe, which is often already fitted to complex machines, together with an AxiSet™ Check-Up system. In just a few minutes, users can identify and report on poor machine rotary axis alignments and, if necessary, alert the machine supplier to carry out further checks and possible error correction.
[790kB] -
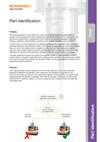 Educational article: (AP200) Productive Process Pattern: Part identification [en]
Productive Process Pattern™ from the process setting layer of the Productive Process Pyramid™. Use a workpiece inspection probe to take measurements on the raw material (or previously machined features) to determine the identity of the component, the component alignment on the machine tool, and/or to check for non-conforming material.
[853kB] -
 Educational article: (AP201) Productive Process Pattern: Intelligent program selection [en]
Productive Process Pattern™ from the process setting layer of the Productive Process Pyramid™. Use a workpiece inspection probe to determine whether the component blank loaded in the machine tool is the correct one for the machining program. Where a unique, identifiable feature exists on the component (or one can be added) a probe may be used to make a logical decision about which of the available cutting programs should be used.
[697kB] -
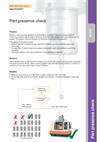 Educational article: (AP202) Productive Process Pattern: Part presence check [en]
Productive Process Pattern™ from the process setting layer of the Productive Process Pyramid™. Use a workpiece inspection probe to identify which components are actually present and should be machined. The probing results can be used to control program logic that determines whether to machine a component or to skip machining if no part is present.
[383kB] -
 Educational article: (AP203) Productive Process Pattern: Job set-up [en]
Productive Process Pattern™ from the process setting layer of the Productive Process Pyramid™. Use a workpiece inspection probe to automatically measure the location of the component and update the relevant offset. Where appropriate, also use the probe to update the orientation of the component using a controller function or a rotary axis.
[393kB] -
 Educational article: (AP204) Productive Process Pattern: Tool setting [en]
Productive Process Pattern™ from the process setting layer of the Productive Process Pyramid™. Use a tool setting probe mounted within the machine tool to automatically set the length and diameter of each tool before machining begins.
[654kB] -
 Educational article: (AP205) Productive Process Pattern: Tool identification [en]
Productive Process Pattern™ from the process setting layer of the Productive Process Pyramid™. An on-machine tool setting system is used to establish tool length and diameter offsets when replacing tools. As a safety check, the measured values are compared against reference dimensions with a tolerance applied: if the tool length or diameter deviation is greater than the allowed tolerance, the process will stop safely before any machining takes place or any damage can occur.
[1.3MB] -
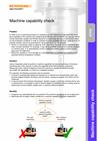 Educational article: (AP206) Productive Process Pattern: Machine capability check [en]
Productive Process Pattern™ from the process setting layer of the Productive Process Pyramid™. Use a workpiece inspection probe to perform a machine capability test before machining. Commence machining only if the machine is within the capability limits defined for the component. Measuring known reference features shows the machine is capable of positioning itself accurately and repeatably, or if there is a capability problem.
[699kB] -
 Educational article: (AP207) Productive Process Pattern: Clearance check [en]
Productive Process Pattern™ from the process setting layer of the Productive Process Pyramid™. Use a workpiece inspection probe to test critical sections of a toolpath where interference is possible. The probe will stop when a collision is detected making it safe to perform this check: a cutting tool is not able to provide this feedback. Proceed with the machining process only after all potentially hazardous areas have been tested and probe results indicate that no obstacles exist within the tool path.
[690kB] -
 Educational article: (AP208) Productive Process Pattern: Parametric programming [en]
Productive Process Pattern™ from the process setting layer of the Productive Process Pyramid™. Use a workpiece inspection probe to measure features which vary between parts within a given family and allocate macro variables for those feature measurements. Different parts can be produced by a family-specific rather than a part-specific program by controlling features that vary between parts using logic based on probe measurement results.
[892kB] -
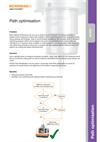 Educational article: (AP209) Productive Process Pattern: Path optimisation [en]
Productive Process Pattern™ from the process setting layer of the Productive Process Pyramid™. Use a workpiece inspection probe to measure workpiece condition. Apply logic based on the measured stock size to control the cutting path so that air cutting is eliminated and machining moves always cut metal.
[819kB] -
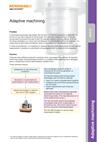 Educational article: (AP210) Productive Process Pattern: Adaptive machining [en]
A manufacturing process may dictate that the form of a finished component is dependent on the form of the input material for that process. In these circumstances, it is necessary to measure the form of the input component and use the measurement to produce a customised cutting program which is unique to that component.
[799kB] -
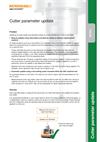 Educational article: (AP301) Productive Process Pattern: Cutter parameter update [en]
Productive Process Pattern™ from the in-process control layer of the Productive Process Pyramid™. Use a workpiece inspection probe to measure the actual size of a machined feature and update the relevant tool offset.
[485kB] -
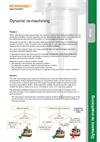 Educational article: (AP302) Productive Process Pattern: Dynamic re-machining [en]
Productive Process Pattern™ from the in-process control layer of the Productive Process Pyramid™. The CNC machining process uses semi-finishing cuts or test cuts (slave features) that are representative of the subsequent finishing cut. The probing system on the machine is used to measure the cut feature and adjust the process through tool offsets to improve final part accuracy (using pattern AP301, Cutter parameter update).
[810kB] -
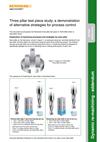 Educational article: (AP302 addendum) Productive Process Pattern: Three pillar test piece: an example of dynamic re-machining [en]
Explanation of machining processes and strategies used to produce the three pillar test piece, and aid in demonstrating the benefits of in-process control.
[346kB] -
 Educational article: (AP303) Productive Process Pattern: Thermal correction - machine drift [en]
Productive Process Pattern™ from the in-process control layer of the Productive Process Pyramid™. Use a workpiece inspection probe to locate and measure the position of a critical reference feature in order to detect machine drift, or use an on-machine tool setter to track movement in a machine’s Z-axis caused by thermal effects.
[1.0MB] -
 Educational article: (AP304) Productive Process Pattern: Tool condition monitoring [en]
Productive Process Pattern™ from the in-process control layer of the Productive Process Pyramid™. When tool breakage is identified as a significant expected risk, it is useful to monitor the condition of the cutting tools which are being used. Performing a tool breakage check immediately after using a tool can help to infer whether the component has been correctly machined - particularly for components where tool breakage is the primary cause of failure.
[187kB] -
 Educational article: (AP305) Productive Process Pattern: In-process datum setting [en]
Productive Process Pattern™ from the in-process control layer of the Productive Process Pyramid™. Use a workpiece inspection probe to measure datum features then store feature or part locations in the CNC in order to reset a current work coordinate system (WCS), or define a new WCS automatically. This procedure can be carried out whenever it is required during a machining process.
[261kB] -
 Educational article: (AP306) Productive Process Pattern: Thermal correction - workpiece expansion [en]
Productive Process Pattern™ from the in-process control layer of the Productive Process Pyramid™. Use a spindle probe to measure the size of a reference feature in the machine environment and compare it with the known size of that feature at 20 °C. Produce and apply a scaling factor or offsets to subsequent part measurements and proceed with machining operations based on parameters corrected for thermal effects.
[1.0MB] -
 Educational article: (AP400) Productive Process Pattern: Process reporting [en]
Productive Process Pattern™ from the post-process monitoring layer of the Productive Process Pyramid™. Most CNC control systems have the capability to send customised information through RS232 serial ports, an Ethernet connection, or to the hard disc of the CNC control. The reporting capability allows a traceable record of the ‘route’ used to manufacture a component to be stored along with the component inspection data. For example, it is possible to log any detail of machine updates, required re-machining, or tools that were broken.
[280kB] -
 Educational article: (AP403) Productive Process Pattern: Critical feature reporting [en]
Productive Process Pattern™ from the post-process monitoring layer of the Productive Process Pyramid™. Select the critical features which are to be measured and reported, according to a set of criteria. Features should be reported where the failure of a feature would be indicative of a more serious process fault (e.g. the final feature machined with each tool); or when the position or dimension of a feature is dependent on other measured features or ‘in process’ calculations.
[741kB]


