Ta strona nie jest obecnie dostępna w Twoim języku. Możesz zapoznać się z tłumaczeniem automatycznym, korzystając z usługi Google Translate. Nie jesteśmy odpowiedzialni za świadczenie tej usługi, ani też wyniki tłumaczenia nie były przez nas sprawdzane.
Jeżeli chciałbyś uzyskać więcej pomocy skontaktuj się z nami.
Special purpose machine manufacturer invests in Renishaw alignment system to expand its capabilities
To ensure that it could deliver the best results for large-scale customer projects, specialist machine manufacturer Metecno Oy worked with global engineering technologies company, Renishaw, to implement a geometric error measurement system. By investing in Renishaw's XK10 alignment laser system, Metecno Oy was able to bring more quality assurance processes in-house, meeting specifications for new customers, whilst expanding its capabilities to deliver high‑quality machines.
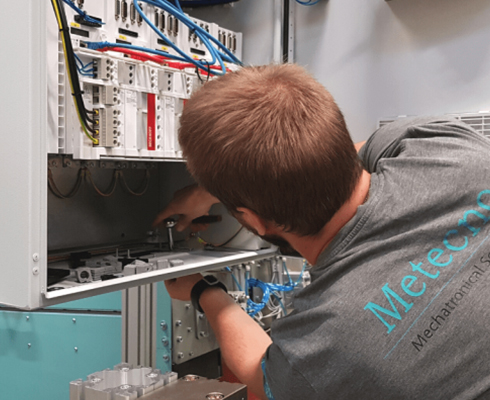
Metecno Oy engineer assembling a CNC machine
Background
Founded in 2008, Metecno Oy is a Finnish, family-owned special purpose machine manufacturer with expertise in CNC machines, automation design and robotic integration. Its team of 12 people provides companies with customised machine and automation solutions on a turnkey basis, designing and building production machines that enhance companies' production, including machine tools, machining centres and milling machines. Because the company supplies solutions to any manufacturer in need of a specialised production machine, Metecno Oy has worked with various industries, including nuclear, metal, rubber, mining and food production.
Metecno Oy is one of the very few manufacturers in Finland that designs and builds bespoke CNC machines. As a result, the business has grown rapidly since its inception, with a record turnover of €1.2 million in 2021 and a promising outlook.
Challenge
A manufacturer approached Metecno Oy with requirements for a customised CNC machine that was much larger than the systems that the team at Metecno traditionally builds. The customer also had very specific tolerance and surface quality requirements.
Accuracy is vital when developing machinery - the operation of the machine could be affected if it is built incorrectly. For example, milling machines feature linear guides to manoeuvre the machine table across each axis. If errors occur when assembling the machine frame to other parts of the machine body, it could move the guides out of tolerance. While minor inaccuracies might not impact product quality, it could reduce the lifetime of the machine. Additionally, once manufactured, the team at Metecno Oy mounts the machine to the floor at the customer site, which can impact the rest of the machine.
As well as ensuring the axes are accurate, CNC manufacturers such as Metecno Oy must consider the perpendicularity of the spindle. If this is not square, it will leave cutter marks on the workpiece, negatively affecting the surface finish of machined parts.
“All the special purpose machines we manufacture must pass strict quality management processes before they are delivered to the customer,” explained Mikko Similä, System Design Engineer at Metecno Oy. “To ensure we deliver accurate and reliable machines, we typically outsource quality checks to a subcontractor. While this works for our smaller machines, when we received the brief for the larger project with tighter tolerance requirements, we knew we wanted to find a way to measure in-house so that we could deliver a high-quality machine and correctly predict its lifespan.”
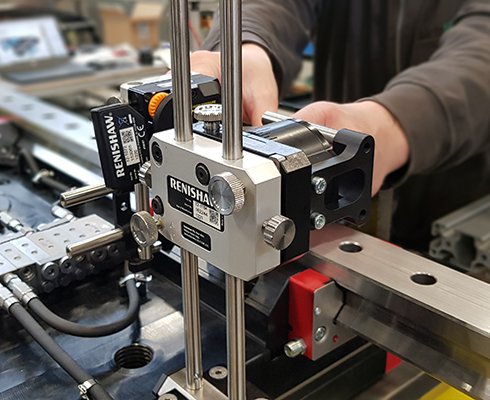
Aligning the XK10 system pentaprism to perform a parallelism test
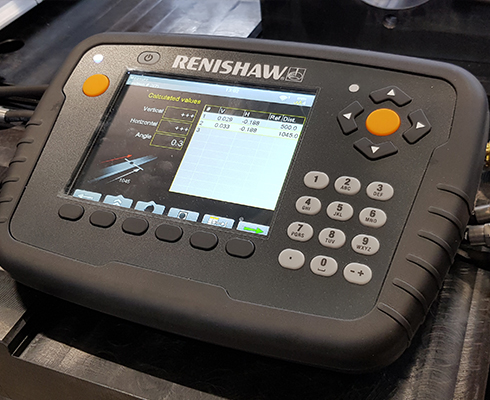
Live feedback with the portable XK10 display unit
Solution
After reviewing different market options, Metecno Oy concluded that the Renishaw XK10 alignment laser system would be the best, most cost-effective solution.
The XK10 system has been developed to measure geometric and rotational errors of machine tools. Using the system alongside its machine tool fixturing kit enables faster and easier measurements compared to traditional methods, such as dial gauges. Measuring geometric and rotational errors during machine build, maintenance and service enables accurate alignment and adjustment of machine axes to achieve optimum performance. This reduces time during machine assembly processes and on-site service, including regular maintenance or following a collision. The XK10 can also measure the angle at which a spindle or chuck is pointing, ensuring accurate alignment through a complete 360° rotation.
“The XK10 system has enabled us to improve our measurement processes for larger machines,” explained Similä. “During this project we used the XK10 to measure the machine during assembly to check the axes are straight along the axis of travel and measure the machine once installed.
With more familiarity of the process, we can monitor external factors that can influence the measurement, such as the effect of environmental changes. We can easily input test parameters into the XK10 display unit and use the versatile fixturing kit to simply check a range of measurements. We have also identified where we can use the XK10 system on future machinery.”
“While using a subcontractor enables Metecno Oy to ensure all its bespoke machinery delivers quality, when speaking to the team, we knew that bringing some measurement processes in-house could benefit the manufacturer and its customers,” explained Isto Tuomisto, Renishaw's Area Sales Manager for Finland. “The XK10 was developed to make building machines easier. The team got to grips with the system very quickly after installation, which will enable the Metecno team to deliver this machine quickly and efficiently. Checking alignment during construction on this project ensures that any errors are identified and adjusted before the machine is built, when they are much more difficult to correct,” continued Tuomisto.
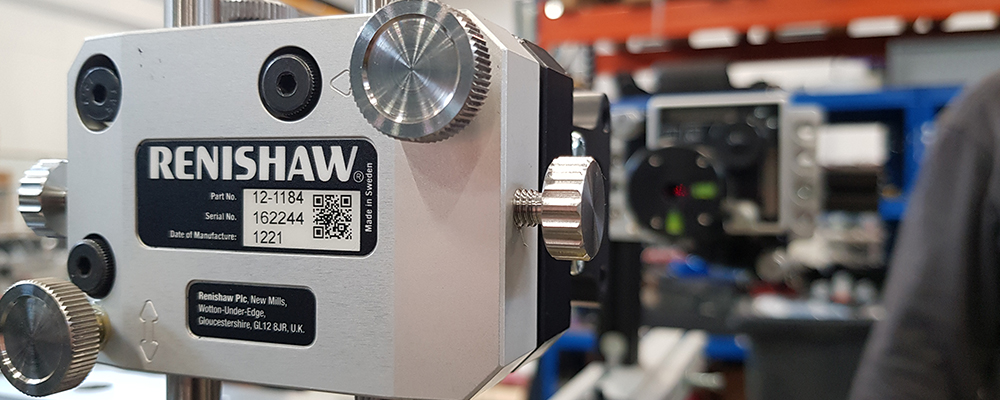
XK10 parallelism kit aligned to the machine's axis
Results
“Investing in the XK10 enables us to validate machine accuracy at multiple points,” stated Similä. “This was particularly useful during this project because, once complete, we will have to disassemble the machine to transport it to the customer site. After rebuilding the machine on the shop floor, we can use the XK10 to check the machine again, reassuring the customer that they have received an accurate machine.”
While this project is still ongoing, we have already seen positive outcomes from investing in the XK10 alignment laser system - we have noticed improvements in accuracy, time savings and a reduction in costs. As a result, we have already seen a return on our investment. Additionally, we can now accept more large-scale projects with the confidence that we can deliver quality and accuracy. Now that we have seen the capabilities of the XK10, we plan to explore how we can use other Renishaw systems to bring more quality assurance processes in‑house.
Metecno Oy (Finland)
