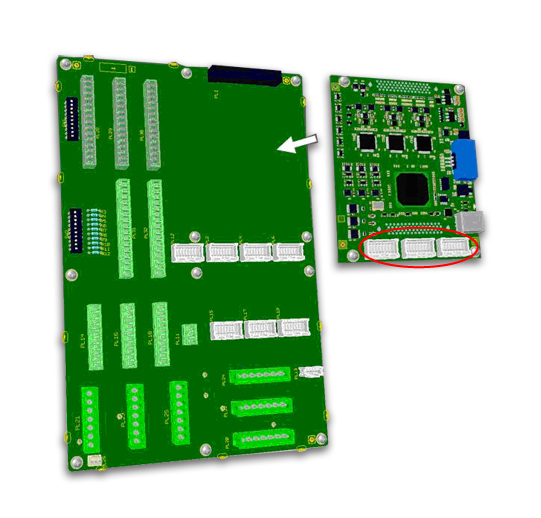
Interpolator card Installation InstructionsThe Interpolator Card is designed to be used in conjunction with Renishaw's range of Retrofit Adaptor PCB's. The interpolator card plugs directly into the adaptor PCB mounted either on the door of the retrofit cabinet, or in a stand alone box. Useful links: 1. Fixing the Interpolator PCB to the adaptor PCBRemove the 4off M3x6 screws from the adaptor card in the positions highlighted and replace with the 4off pillars that are supplied. Connect the interpolator card using the highlighted connector. Secure the card in place by fitting the 4off M3x6 screws (torque to 0.7 Nm) into the 4 hole positions highlighted.
Connect the CMM readheads to the card in the 3 positions shown. |