Ez az oldal az Ön nyelvén jelenleg nem elérhető. Az automatikus fordítás a megtekinthető a Google Fordító segítségével.
A szolgáltatás biztosításáért nem vállalunk felelősséget, a fordított szöveget nem ellenőrizzük.
Ha további segítségre van szüksége, lépjen kapcsolatba velünk.
Internal combustion engines

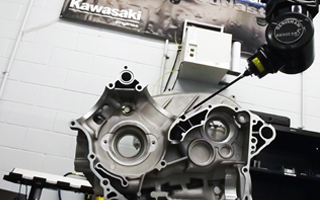
The REVO scanning capability allows us to catch form errors much more quickly, without a time penalty on our inspections. It has definitely made us more proactive in catching quality problems early in the game.
Kawasaki (USA)
REVO® for powertrain manufacturing
Global powertrain manufacturers are constantly pushing the boundaries of mass production processes to produce engines that meet the ever-increasing demands of their users and customers.
With REVO's 5-axis positioning with integral surface finish measurement, we're able to inspect parts such as cylinder bores, bearing journals and valve guides.
NC4+ Blue non-contact tool setter for on-machine tool measurement
Featuring industry-first, blue laser technology (patent pending) and improved optics, Renishaw's NC4+ Blue non-contact tool setting systems deliver significant improvements in tool measurement accuracy, ensuring components can be machined more accurately and efficiently on CNC machine tools.
High precision tool setting arms
For tool measuring and broken tool detection on 2-axis and 3-axis CNC lathes and grinding machines, reduce setting times by up to 90% and improve your process control.
Ultra-fast probing for workpiece set-up, surface condition and form monitoring
Driven by SPRINT™ technology, SupaScan is the fastest on-machine probing solution for workpiece set-up. Surface condition and form can also be monitored – greatly enhancing your on-machine inspection capability.
Gauging a connecting rod with the Equator™ gauging system
Ensure that components which are part of critical assemblies are made within tolerance, improve process control and reduce inspection costs with the Equator™ gauging system.