Por el momento, esta página no está disponible en español. Puede obtener una traducción automática mediante la opción de traducción de Google.
No podemos responsabilizarnos de este servicio puesto que podemos no verificar los resultados de la traducción.
Si desea más información, póngase en contacto con nosotros.
Equator gauging system leads to 30% increase in manufacturing capacity
Manual gauging processes were incapable of delivering the throughput necessary to achieve a high-volume part-manufacturing target at Olympus NDT. By automating inspection processes using a programmable shop floor gauging system, Olympus NDT gained the manufacturing capacity it needed, improved part quality and reduced scrap.
Background
Olympus NDT is a world-leading manufacturer of non-destructive testing (NDT) instruments that are used in industrial applications ranging from aerospace, power generation, petrochemical, civil infrastructure, automotive and consumer products.
The company's cutting-edge NDT technology can identify hidden flaws and imperfections in a wide range of parts and materials, both metallic and non-metallic.
Compared to many alternative inspection techniques, NDT instruments save significant time, staffing and equipment costs by applying technology to reveal hidden defects where internal structures are inaccessible.
Olympus NDT is located in Quebec's Michelet Innovation Zone, where its modern, purpose-built facility operates as the organisation's principal machine shop, serving multiple Olympus sites in North America.

Non-destructive testing instruments

Precision wedge component under testing
Challenge
Olympus NDT manufactures a precision wedge component to correctly align parts for non-destructive part testing. The wedge is located between a part and the NDT equipment probe, to ensure that the part is positioned at the optimal angle for inspection and the probe is protected from any damage.
The demand for NDT wedges has grown rapidly in recent years, as the Quebec plant supplies four Olympus sites across Canada and the US. The increased workload in the machine shop made automation essential to achieve the manufacturing efficiency required.
While the dedicated 5-axis CNC milling machine and loading robot allowed production through night and weekend shifts, dimensional inspection of the wedges post-production was creating an unacceptable bottleneck and costly downtime. Manual gauging techniques were too slow, and the increased production was placing a high demand on skilled labour required elsewhere.
An advanced, automated in-process inspection solution able to maximise manufacturing throughput while ensuring the precision of the wedges was needed.
Solution
To meet its needs, Olympus NDT required a completely autonomous manufacturing cell comprising part milling and inspection as well as part handling.
Renishaw's Equator™ gauging system was considered the ideal in-process solution, ensuring reliable inspection results and maintained repeatability at very fast operating speeds.
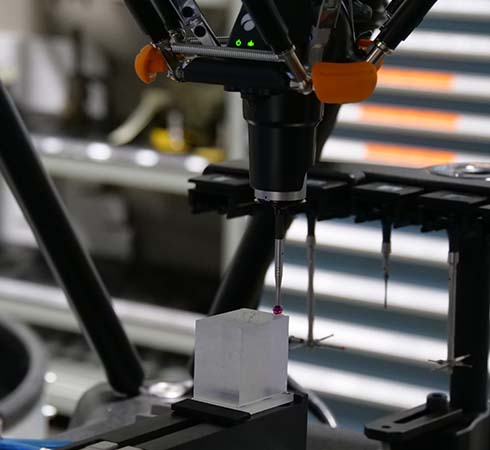
Equipped with Renishaw's SP25M 3-axis analogue scanning probe, the Equator gauge can capture 1,000 data points per second, enabling the measurement of position and form on each wedge produced.
The Equator gauging system works as a comparator, validating each production part against a master reference part. The master part is measured first to generate a master data set. Then, each production part is measured and compared with the master data set to verify that it is within tolerance. The measurement data is used to update CNC machining parameters automatically to maintain control of the process and prevent production of bad parts.
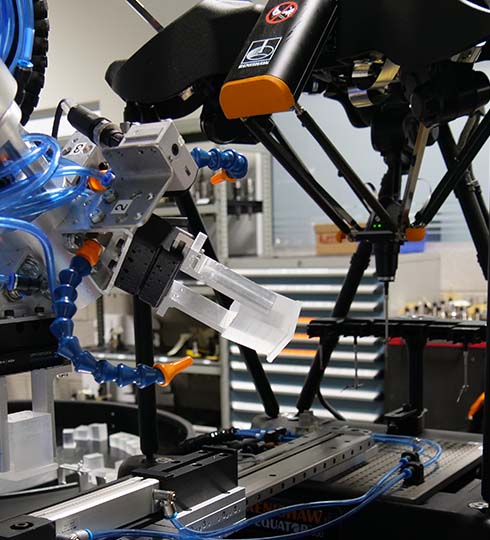
Additionally, the Equator gauge has been fully integrated into the wedge production cell, removing the need for manual intervention. Following machining, a robotic part handler retrieves the wedge from the machine tool and places it onto the Equator gauge via a pneumatic transfer system.
The robot and Equator gauge communicate using a digital I/O whereby the robot communicates when a part has been loaded and the Equator gauge communicates once the inspection cycle has been completed.
Renishaw's Intelligent Process Control (IPC) software, which runs on the Equator Controller, uses inspection results to generate tool offset updates; the updates are then fed back to the machine tool controller to automatically correct for any tool wear.
Since we can now run the machine both during the night and over the weekends, we have increased our machine capacity by almost 30%. The benefits of automating the wedge inspection process are considerable. We have reduced machine downtime, reduced the cost of scrap parts and improved the quality of parts produced.
Olympus NDT (Canada)
Results
Automating the wedge inspection process using Equator has succeeded in helping Olympus NDT achieve its manufacturing and throughput goals. With support from Renishaw, the complete system implementation took just 3 months from inception to commissioning, and as an alternative to labour-intensive manual gauging solutions, it has also delivered a rapid return on investment.
Importantly, the solution has clearly demonstrated how production bottlenecks can be overcome. The Equator gauging system is designed to be used directly on the shop floor. The system is located immediately adjacent to the CNC machine, thereby maximising the efficiency of the inspection process. It carries out 100% inspection of the wedge parts rather than a sample inspection.
The ability of the Equator system to interface directly with the CNC machine allows any necessary offset updates to be made automatically as soon as a drift in feature size or position is detected. As a result, the quantity of reject parts has been minimised.

Precision wedge component being scanned on Equator gauging system

