ZF has improved pump production with an Equator™ gauging system - compact, rugged and able to inspect
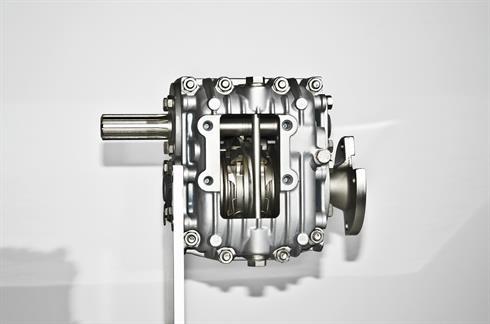
ZF Marine in Padua, Italy, a manufacturer of pumps for marine propulsion systems, was looking for faster process control, with greater measurement capability.
Whether used as commercial, leisure or even military vessels, ships have been one of the most popular and versatile means of transport for centuries, and that's why safety, reliability and efficiency are the main requirements for marine drive systems. ZF Marine is a globally active company specialising in the design and development of complete propulsion systems for all types of craft; a company that guarantees high-quality and innovative products.
To ensure it produces the high-performance, technically advanced products that the market demands, the company has re-organised production into efficient focused work cells. As part of this, cell 5, dedicated to pumps, initiated a project to improve the performance and speed of quality control.
Improvements to production efficiency
ZF's issue is seen in many manufacturing companies where production must be monitored constantly: there is a risk, often becoming reality, that the measuring room can be the limiting factor for production. By using Equator systems directly on the factory floor it is possible to bypass potential measuring room bottlenecks, avoiding the transfer time to the measuring room, and reducing the time it takes to inspect parts.
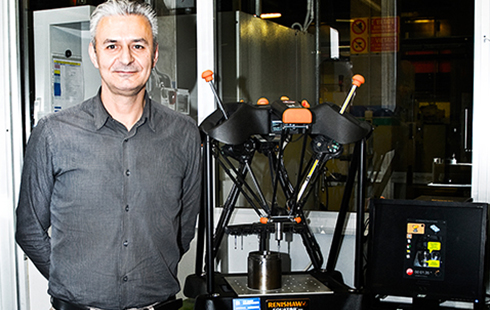
Mr Matterazzo explains further, “We researched this by talking to the suppliers that had provided our machine tools, and arrived at the Equator gauge, or as we call it the ‘mechanical spider', which turned out be to be exactly the right solution for our needs. The Equator gauging system lets us keep production under control in an extremely precise manner, with the ability on one device to gauge all the profiles and dimensions we need to, directly in production, even on parts with very different designs. Traditional gauges allow specific dimensions to be checked, but not all in one system. The flexibility and configurability of Equator gauge lets us do a series of scans to assess every feature, including hidden dimensions that can't be reached with traditional gauges. It can also gauge other factors that are important for us, for example concentricity and flatness.”
Comparative measurement is the key
The Equator gauging system isn't a traditional absolute measuring machine, instead it gauges parts by performing comparative measurements to a master part. Why is that a big advantage for production and process control? Most of the time there is a difference in temperature between the measuring room and workshop, which inevitably influences the measurement of parts that arrive from production. Even if a traditional measuring machine was brought into the workshop, its characteristics would mean it takes too long to reach ambient conditions, with temperatures changing rapidly in the workshop. And that's not the only problem. Thermal deformation isn't linear, it varies with shape and size, making measurements unreliable. So it's better to leave the traditional measuring machine in the metrology room with its controlled atmosphere.
With the Equator process control system from Renishaw, we found a gauging machine that is sophisticated, precise and very versatile, while still being easy to use. We put it through a series of tests and today Equator is at the heart of our measurement.
ZF Marine (Italy)
Master parts and production parts
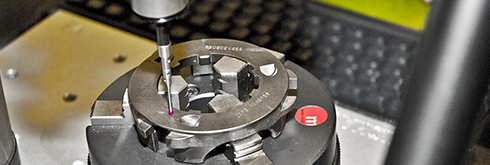
The Equator systems gauging process, however, is an evolution of the traditional gauging principle of comparison between production parts and a designated master part, which eliminates differences due to temperature variation. The master part is taken from the production process to ensure it is exactly the same material and produced with the same method; it is always kept in the production environment to ensure it is subject to the same ambient conditions. The innovative high-repeatability technology of the Equator gauge, with a lean but rugged structure and parallel kinematic mechanism, means that this gauge is much less vulnerable to the influence of temperature than a measuring machine, with a response similar to that of the parts being compared.
“It starts with a valid master part being calibrated on a CMM in the measuring room,” explains Quality Manager Gerardo Matterazzo. “The calibrated master part is brought into the production environment where, as it adapts to the environment, it undergoes thermal deformation. This master part is measured by the Equator system to zero the process. Checks on subsequent pieces, using the same program, are by comparison with the dimensions of the master part. This allows us to detect any deviation from the master part, and, taking into account the calibrated values from the CMM, to verify how the measured parts differ from the design specifications."
Re-mastering when conditions change
“Given that conditions in production vary over time, we have identified an optimal interval for the re-mastering, of about two hours, to ensure that deviations between measurements are lower than one percent. The re-mastering of the reference part takes the same time as measuring a production part and thus has virtually no effect on the overall time for the process,” continues Matterazzo.
The rapid re-mastering process thus allows almost immediate compensation for any thermal effect, returning data comparable to that achievable in the metrology room at a controlled temperature. For whatever reason a process may drift, The Equator gauge provides continuous process control, having a built-in method of coping with changing conditions that doesn't affect production time.
However, that is not all. In addition to process control of a single part, it is possible to switch quickly to measuring other parts or to quickly change the measuring program to cope with design changes to existing parts. The measuring results from the Equator gauge can also be used to make changes to tool offsets on the machine tool, and close the loop to provide automatic control of the process.
Easy shop-floor operation
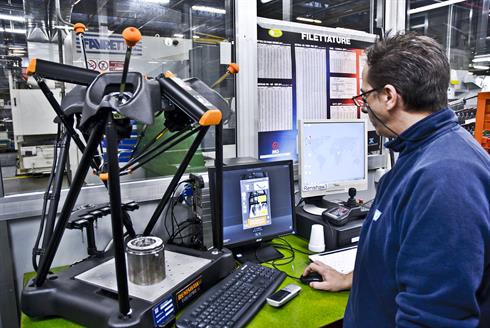
For the shop-floor operator the use of the Equator gauging system requires no special training or experience in the measuring room, as it is very intuitive. The results of the comparison are displayed in various ways on the Process Monitor screen, as a graph and a numeric table, where the part's features of interest can be selected, along with a classic colour bar chart to show the gauging results as a percentage of tolerance for each feature.
“We did quick training on the shop-floor operation of the Equator system and now we are all able to use it, starting with zeroing the system with the master part, through to interpretation of the gauging results,” said ZF production staff.
“We realised that it was possible to save time,” explains Gerardo Matterazzo, Quality Manager at ZF, “but we had to identify the right tool. With the Equator process control system from Renishaw, we found a gauging machine that is sophisticated, precise and very versatile, while still being easy to use. We put it through a series of tests and today Equator is at the heart of our measurement in cell 5.”
ZF Marine (Italy)
No need for regular re-calibration and reduced maintenance costs
Mr Matterazzo mentions another important aspect, “It should be noted that the benefits don't stop there. There is no periodic calibration, because every time I run a master, it's just like recalibrating, so we save those direct costs (the cost of calibration) as well as the indirect cost of downtime. Work never has to stop for maintenance because Renishaw can provide immediate support: this strategy isn't just about the costs, it also meets the needs of real-life production, and is very important.”
The Equator gauge will play a key part in future plans at ZF Marine. The Equator gauge will be relocated to the centre of cell 5 to take full advantage of the possible efficiencies, then ZF will look at where other Equator systems can be used in production. ZF also intend to retrofit touch probes to existing machine tools, another service provided by Renishaw.
Background
The Equator mechanism is based on a principle called “parallel kinematics”, giving it a high degree of repeatability and reducing inertial forces and energy consumption when compared to traditional Cartesian structures used on both measurement machines and machine tools.
Cartesian structures with three orthogonal XYZ axes are typically heavy, to ensure the rigidity required for precise positioning. This massive structure, however, can lead to a delayed response when under load, resulting in possible distortion to the structure. As well as that, the mass of the axes means that the speed of motion cannot be too high, with significant inertial forces requiring more power for the same acceleration, imposing a practical limit on the speed of movement. These inertial forces result in small deflections and thus displacements that, even though minimal, can cause errors in measurement.
In contrast, Equator's structure has three linear drive shafts mounted on Hooke's joints on the upper structure. The other end of each shaft is connected directly to the platform of the probe, so the sensor is close to the axes that move it. The motors drive the shafts into position with joints that allow them to remain in a state of pure tension and compression, eliminating bending. Linear encoders are mounted on the movable drive shafts, so position feedback is provided in the same place as the driving force is applied. All these factors together eliminate undetected movement. The three linear shafts, called the P, Q and R axes, are mounted in an unconventional orientation, but all movement commands (based on conventional X, Y and Z coordinates) are converted by mathematical algorithms running in the background.
