Using QC20 ballbar for ISO 10791-6 standard
Verify and adjust the kinematic accuracy of 4 and 5 axis machine tools using QC20 ballbar for ISO 10791-6 standard.
What is ISO 10791-6?
The ISO 10791–6 standard is used to verify the kinematic accuracy of 4 and 5 axis machines, specifically those equipped with 3 linear and 1 or 2 rotary axes.
This standard enables the precise assessment of contouring accuracy in linear and circular paths by simultaneously coordinating movement across three traditional Cartesian axes and 1 or 2 rotary axes.
The ISO 10791-6 standard primarily focusses on evaluating machine tool performance rather than offering compensation data for machine correction.
Additional information can be found in the ISO 10791-6 standard and the application note below.
What do I need to perform the test?
QC20 ballbar

Most tests defined in ISO 10791-6 can be completed using a QC20 ballbar for machine tool verification. During multi-axis movements a machine tool is trying to maintain a fixed separation between the tool tip and workpiece. The QC20 ballbar is able to measure the contouring performance by measuring any deviation between the tool tip and workpiece whilst following multi-axis tool paths.
Ballbar Trace software

The ISO 10791-6 standard requires reporting of the maximum to minimum deviation which can be achieved simply by capturing data with Ballbar Trace software.
Data captured using Ballbar Trace can then be analysed and reported to ISO 10791-6 using XCal-View data analysis software (version 2.3 and above).
Ballbar spindle centring device

To perform tests to ISO 10791-6 standard, it is critical that the ballbar tool cup is centralised in the spindle prior to testing. Although ISO 10791-6 does not specify a centricity value, to eliminate test set-up error the tool cup must be aligned to the spindle centreline.
The Ballbar spindle centring device helps to centralise the tool cup tip with the spindle centreline.
Shanks and adaptors

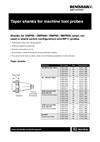
Taper or parallel shanks compatible with the Renishaw OMP40 probe. Alternatively, an OMP60 taper shank can be used with an OMP40 shank adaptor to provide a method of positioning the tip of the toolcup on the spindle centreline.
The datasheets below contain additional information on the shanks and adaptors.
XCal-View analysis software

XCal-View analysis software (verion 2.3 and above) quickly analyses data captured by Ballbar Trace.
Reports can be generated instantly with XCal-View analysis software in compliance with various international machine performance checking standards, including ISO 10791-6.
Part program

Specific part programs are required to perform tests conforming to ISO 10791-6. Ballbar Trace software does not currently produce a part program.
See additional resources below to download and edit macro-based part programs to suit your machine under test.
How can Ballbar Trace software help with machine tool verification?
Ballbar Trace is flexible software for time-based QC20 ballbar data capture which can be extended up to 5-axis machine verification.
This real-time data capture software adheres to ISO 10791-6 standards and helps in static monitoring for vibration and machine tool drift.
Enhanced data analysis
Ballbar Trace data can be quickly analysed using XCal-View data analysis software (version 2.3 and above).Reports are generated instantly according to ISO 10791-6 and many international machine performance standards.
Download Ballbar Trace
Free of charge QC20 ballbar data capture software for 5-axis machine tool verification.
Contact our sales team today
Get in contact with your local office to find out more information and speak to an expert.


