Renishaw and Hartford combine to deliver intelligent, ‘smart factory’ solutions
Background
Established in 1965, Hartford is Taiwan's biggest exporter of CNC machining centres as well as being the country's largest machining centre manufacturer. It is recognised as one of the CNC machining industry's leading global brands with a reputation for technological advancement.
Hartford's comprehensive range of machine tools is used extensively by major manufacturers including Airbus, Boeing, CRRC Corporation, Ferrari, Ford, Foxconn, LG, Pratt & Witney, Samsung, Siemens and Volkswagen.
Developments in Industry 4.0 technology and world shortages in skilled labour have meant that forward-thinking CNC machine manufacturers like Hartford are placing greater emphasis on automation, connectivity, data transparency and ease-of-use.
However, achieving Industry 4.0's goals of ‘intelligent manufacturing' and the ‘smart factory' still relies on accurate and effective process control systems. They need to be easy-to-use and provide sufficient immediate data to enable self-correction and adaptation to any sources of process variation.
Achieving the goal of ‘intelligent manufacturing'
For Hartford, a global company that has exported 46,000 machines to 65 countries across Europe, North America and Asia Pacific regions, maintaining the very high quality of its product in the face of rapid technological and economic change and fierce international competition is a key consideration.
At its manufacturing facility in Taiwan, the company produces a complete range of medium to large-sized three-axis and five-axis CNC machines for use in major industry sectors including aerospace, automotive, electronics and energy. Its product range comprises vertical machining centres, precision boring machines and gantry-type machines.
With more than 95% of Hartford's cast components being manufactured and machined in-house, a continuous and progressive approach towards quality inspection is essential for achieving the precision required for a wide range of machine components, including machine heads, spindles and automatic tool changers.
Helping customers cope with the widespread shortages of skilled labour presents Hartford with a further vital challenge to address, as Mr Bruce Lin, Manager of Hartford's R&D Intelligent Technology Department explained: “Our customers are needing to process work pieces of increasing complexity, however a lack of skilled labour means they are having to insist on machining centres that are even simpler to use.”
Intelligent HMI with Renishaw app
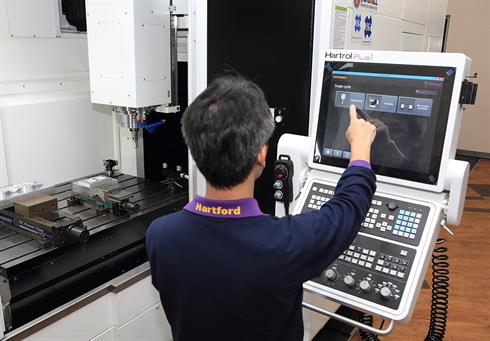
Hartford has invested significant resources into the research and development of intelligent CNC controllers in recent years and developed Hartrol Plus. The Hartrol Plus intelligent controller is as simple to use as a smartphone.
The HMI provided by the Hartrol Plus CNC controller follows key design principles promoted by Industry 4.0 ideals and helps address skills shortages. It provides machine operators with all the information they need to make the right decisions. The way in which it visualises data helps operators to make more informed decisions and solve problems more quickly.
Renishaw's Set and Inspect on-machine app has been integrated with Hartford's new controller, enabling users to exploit advances in automated measurement and data collection, making machine tool operation and human-machine interactions simpler and more intuitive. Set and Inspect is a highly visual graphical user interface (GUI) which leads the operator through every step of on-machine probing processes including workpiece set-up, tool setting and other measurement tasks.
Operators no longer need to commit machine code instructions to memory, reducing data entry errors and programming times, as well as increasing processing efficiency by as much as 20%. Hartrol Plus has been well received by customers, with more than 1,000 units sold to date.
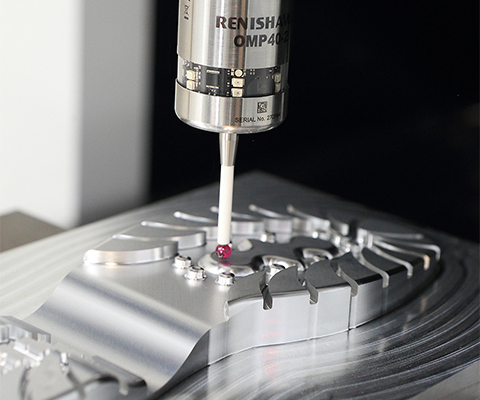
The new Hartrol Plus controller has been designed to make our machines easy to use. Set and Inspect is the perfect addition as its graphical user interface means that operators can program machine tool probing routines with ease.
Hartford (Taiwan)
Precision measurement for high quality CNC manufacturing
Hartford began using Renishaw products more than 20 years ago. In order to meet its stringent high-quality objectives, the company has introduced a variety of Renishaw high-precision measurement systems.
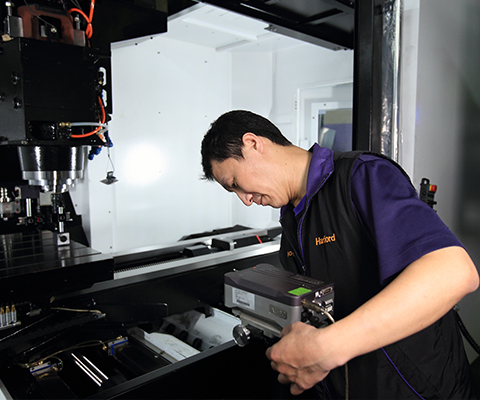
The precision of all CNC machined components it manufactures is verified using Renishaw PH20 5-axis probes on co-ordinate measuring machines (CMMs). This happens before components enter the assembly line, to ensure that they are ready to be assembled.
Precise assembly and positioning of machine tools is also critically important, with five-axis machine tools needing to be positioned with a deviation of less than ±6 µm. A Renishaw XL-80 laser interferometer is used to measure machine position and both linear and angular errors. The XL-80 generates an extremely stable laser beam with a wavelength that conforms to international standards. Linear measurement accuracy of ±0.5 ppm can be guaranteed, thanks to a precision stabilised laser source and accurate environmental compensation. Hartford uses the Renishaw QC20-W ballbar measurement system to perform cross-validation at different operating speeds to ensure that X- and Y-axes of the machine tool are correctly matched, and errors are kept down to less than 5 µm.
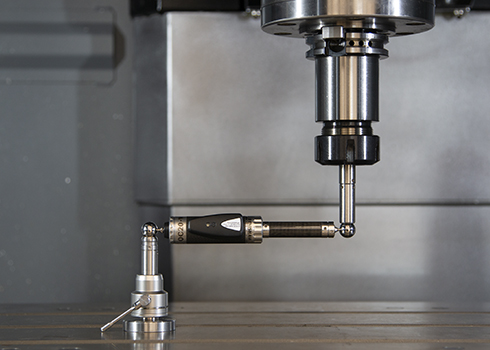
Every Hartford CNC machine not only undergoes 100% laser verification and ballbar testing before dispatch, it can also use the customer's own workpiece for processing verification, with Renishaw OMP40, OMP60 and RMP60 machine tool measurement probes used to measure the precision of the processed work piece.
AxiSet™ Check-Up for rotation centre compensation
Hartford also uses Renishaw AxiSet Check-Up to analyse the performance of machine rotary axes. Compatible with common 5-axis and multi-axis machines, it provides CNC machine users with a fast and accurate way to check the location of rotary axis pivot points and automatically compensate if necessary.
Importantly, AxiSet Check-Up does not need to rely on operator experience, as the operator can simply call up the relevant program and press ‘Cycle Start' to complete the test process in just a few minutes. Data is automatically recorded into parameters for use in analysis, further guaranteeing the standardisation of every machine tool produced.
Mr Lin said, “We also recommend that users use AxiSet Check-Up to test the machines' rotary axes after they are installed, as factory conditions may differ significantly from Hartford's manufacturing conditions, in terms of foundations and how level surfaces are. Shipping and installation can also cause precision errors, so AxiSet Check-Up's automatic compensation allows machine tools to maintain high levels of precision and quality.”
He continued, "All machine tools can suffer from wear and drift after a certain period of usage, with the level of precision of their positioning declining over time and causing a correspondingly poor level of machining precision. We therefore recommend that users perform scheduled checks on machine tools using AxiSet Check-Up every 6 to 12 months, in order to ensure that the level of machining precision remains consistent and productivity remains high."
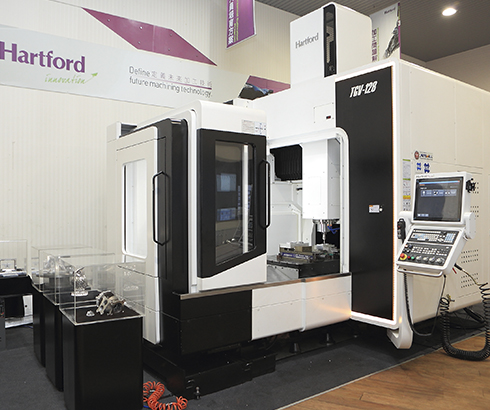
In the manufacture of its world-leading brand of CNC machines, Hartford's on-going commitment to stringent quality inspection has seen the company continuously embrace the latest thinking in process measurement techniques.
Its imaginative use of leading-edge Renishaw measurement solutions over time has helped sustain its global competitive edge and reflects Hartford's bold corporate philosophy: “We are here to make the best machines to the highest standards.”
