Bu sayfa şu anda sizin dilinizde mevcut değildir. Google'ın Çeviri sistemini kullanarak
otomatikleştirilmiş çeviriye
ulaşabilirsiniz. Bu hizmeti sağlamaktan sorumlu değiliz ve çeviri sonuçları tarafımızdan kontrol edilmemiştir.
Eğer daha fazla yardıma ihtiyaç duyarsanız lütfen
bizim ile temasa geçiniz.
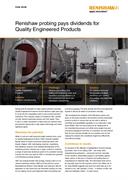
Renishaw probing pays dividends for Quality Engineered Products
Having built its reputation in high-volume precision pressing, Quality Engineered Products took the decision eight years ago to move into the competitive world of sub-contract precision machining. The company, based in Cinderford (UK), started out with vertical machining centres and CNC lathes. Then, in 2015, a major investment in state-of-the-art machine tools provided the opportunity to fully exploit technology and make significant gains.
Maximise the potential
While it is all very well having the latest machine tools, such as Quality Engineered Products' (QEP) recently installed Mazak Nexus III Series horizontal machining centre and Mazak Integrex i-200 multi-tasking machine, maximising their efficiency requires more detailed development of the machining process. Having won a major contract to machine a range of sand-cast aluminium parts for its customer Cannop Foundry, the time was right for QEP to maximise the potential of its Renishaw probing systems.
QEP was already familiar with probing, having used it on its vertical machining centres (VMCs) for the past four years. Manufacturing Director, Dave Marfell, was looking to take its application to new levels and use Renishaw probing not only for tool setting, but for part alignment before machining and in-process gauging. The time savings that this would generate equate to almost 20 weeks of production annually.
“We recognised the potential of the Renishaw probes very early on and have invested in the systems and the associated process controls to ensure that we are able to deliver a controlled and quantifiable capability to our customers,” says Dave Marfell. “We now see probing as an integral part of our manufacturing process and while some people may see in-process gauging as lost time on a machine, we look beyond that and see massive benefits for our business and we are reaping the rewards. We sometimes forget how difficult life was without probing.”
Confidence in results
An example of this difficulty is highlighted in the first probing procedure, that of tool setting. QEP – like many other manufacturing businesses – previously set tools manually on the machine, using feeler gauges to set lengths against datum points on the part or machine and trusting the tool manufacturer for diameter data. This information then had to be manually input into the machine control and offsets set. In all, Dave Marfell suggests that each tool could take up to six minutes to set, with typically 15 tools – a mixture of drills, end mills and indexable cutters – in each set-up. QEP now uses both Renishaw NC4 non-contact and TS27R contact tool setting probes, capable of ±0.10 µm 2σ and 1.00 µm 2σ repeatability respectively.
Now each tool probing cycle (including diameter measurement) takes less than 30 seconds, and every tool can be checked in quick succession, with data being transferred automatically to the CNC. Another major benefit of on-machine tool setting is the elimination of human error. “Using the old-fashioned methods of paper or feeler gauges, no two people would get the same result, so you would then have to take test cuts to confirm any offsets. With the Renishaw probes we can be confident we have correct and consistent data and we are saving in the region of 85 minutes per set-up, just on tool setting.”
With the Renishaw probes we can be confident we have correct and consistent data and we are saving in the region of 85 minutes per set-up, just on tool setting.
Quality Engineered Products (UK)
Increased productivity
The next stage of developing the Renishaw probing sequence came through the contract with Cannop Foundry. The requirement was to machine a range of aluminium sand-cast components in five different designs, with typically 50-off per batch. Cannop Foundry supplied the fixturing along with its method of setting the castings, which can vary due to the sand casting process. This method involved a high degree of manual intervention using setting plates and a reliance on the operator to ‘get it right', as well as being time consuming.
Dave Marfell recognised that there was potential to maximise labour efficiency by introducing Renishaw probing to the process. “We looked at the existing process and realised that we could release a significant amount of time by probing the part once it was transferred into the machine. This freed up the operator to work on other things, such as deburring and visual inspection of parts. It's here that some would baulk at the machine downtime as we now spend between 60 and 90 seconds probing before machining starts, but we have given the operator over five minutes back to do other things, and again we have eliminated any potential for human error from the process which, in part, is helping to reduce scrap by 25%. So, those few seconds we spend probing the part for alignment are fully justified.”With tools and part set, attention turned to inspection. QEP's routine was to check 1 in 10 parts on a co-ordinate measuring machine (CMM), a process that would take at least 30 minutes. While this part was being checked they had two options; to stop the machine until the part had been verified, or to carry on machining and ‘quarantine' parts until the sample had been checked. Both have their obvious drawbacks.
“Our challenge was to streamline the process and ensure that we could verify every single component that we delivered. Over a 12-month production run we estimated that using the CMM would result in 270 hours of lost production time.” By switching to in-process gauging using Renishaw RMP600 and RMP60 probing systems, QEP can check the same 1 in 10 parts on the machine. The probing cycle is two minutes per part, which represents a significant productivity gain compared to the previous method, saving around 2 hours 20 minutes per batch. Subject to conditions, it is possible to achieve repeatability of 0.25 µm 2σ using the RMP600, and 1.00 µm 2σ using the RMP60.
Being accredited to AS9100 and working with diverse industries including aerospace, marine, and automotive, validation of all of its processes comes as second nature to QEP. It has put in place procedures to ensure that what it does with its Renishaw probing systems is fully documented and appraised on a regular basis. Dave Marfell takes a pragmatic view to all of this: “We can control the quality of our machining, irrespective of the machine types we buy or the age profile of the machines we have in service. We have put in place standard procedures that verify what our machines are doing, backed up by the Renishaw probes and measured against standards. These procedures confirm the confidence that we now have in probing across a range of disciplines and the time we have released as a result allows us to add value for our customers, which can only be viewed as a win-win situation.”


