Ta strona nie jest obecnie dostępna w Twoim języku. Możesz zapoznać się z tłumaczeniem automatycznym, korzystając z usługi Google Translate. Nie jesteśmy odpowiedzialni za świadczenie tej usługi, ani też wyniki tłumaczenia nie były przez nas sprawdzane.
Jeżeli chciałbyś uzyskać więcej pomocy skontaktuj się z nami.
Machine tool probing increases productivity for Australian machine shop
When Australia-based machine shop, Hammond Engineering, found that manually setting workpiece positions was time consuming and difficult to repeat, it looked to the potential of on-machine probing. Since using Renishaw's OMP40-2 optical transmission probe, the company has experienced faster set-up times and higher levels of productivity.

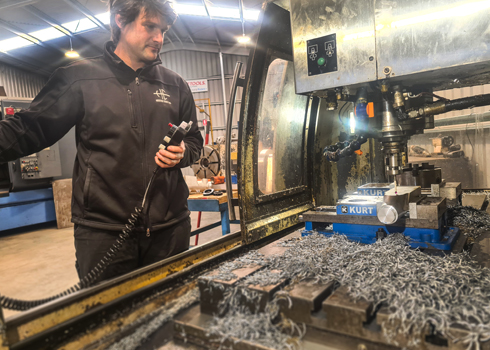
Travis Hammond, Founder of Hammond Engineering
Background
Hammond Engineering is a machine shop based in Bairnsdale. Its services include computer aided design, CNC milling and turning for production sizes ranging from prototyping to large industrial runs.
“I started Hammond Engineering to combine my passion for metalwork with my love of IT,” explained Travis Hammond, Founder of Hammond Engineering. “After completing my First Class Machinist apprenticeship, I found myself a second hand CNC lathe and went from there. Now, we're a team of three working to provide a more technology focused engineering service than the area has had in the past.”
The company primarily works with customers in the food and aftermarket automotive parts sectors, but also offers general manufacturing and repairs for local industrial businesses.
Time taken to make changes, for example to align a vice or set up a workpiece, means time that the machine is not running. In such a small business, lost time is costly, so we started looking for a way to increase productivity, reduce turnaround times and reduce human error.
Hammond Engineering (Australia)


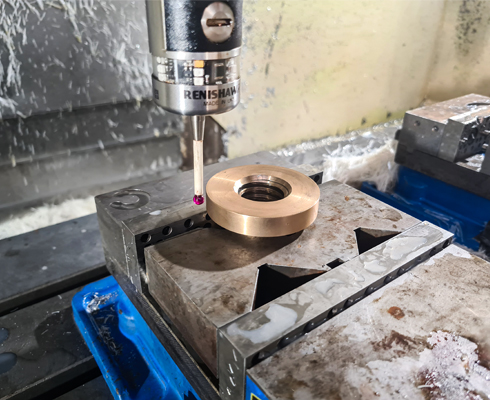
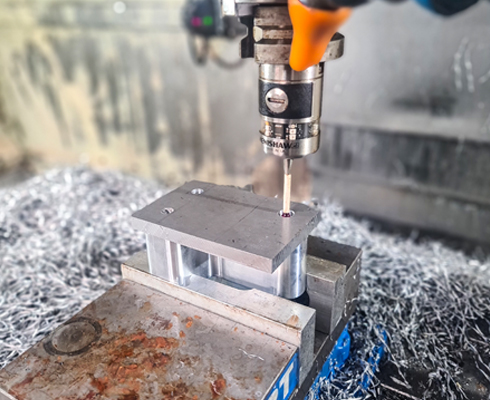
Workpiece set up and inspection using Renishaw's OMP40-2 optical transmission probe
Challenge
“When doing general ‘job shop' type work, our team must change machine set ups several times during the day,” continued Hammond. “Time taken to make changes, for example to align a vice or set up a workpiece, means time that the machine is not running. In such a small business, lost time is costly, so we started looking for a way to increase productivity, reduce turnaround times and reduce human error.”
Solution
“As we're a very small business looking to reduce costs, we often buy machines second hand,” continued Hammond. “When we purchased our latest machining centre, it came with a Renishaw probe attached, so we began to use it for part set-up to see if we could improve accuracy and productivity.”
Hammond Engineering's machining centre was fitted with an OMP40-2 probe. This ultra-compact 3D touch-trigger probe with optical signal transmission is primarily used for workpiece set-up and inspection in machining centres. It offers users up to a 90 per cent reduction in set-up time, as well as a reduction in scrap and fixture costs.
Results
Since using the OMP40-2, Hammond Engineering has experienced faster set-up times. For example, before using the equipment, aligning a vice would typically take around five minutes to complete — with the OMP40-2 this task takes less than a minute. The benefits will add up over time — if the team uses the probe to help align one vice a day, the company will save 17 hours a year. Using the probe also reduces the chances of human error impacting production because it can calculate angles without the need for human intervention.
“I can't believe it took me this long to realise how valuable probing is in my work environment,” said Hammond. “Now that I can see how user-friendly and accurate the OMP40-2 is, it would be hard to convince me to use anything else.”
In the future, Hammond Engineering plans to use the OMP40-2 for in-process measurement on repeat parts to ensure correct positioning and alignment. The company also plans to use tool breakage detection to improve process reliability and confidence.

