Deze pagina is momenteel niet beschikbaar in uw taal. U kunt met behulp van Google Translate een automatische vertaling bekijken. Wij zijn niet verantwoordelijk voor deze dienstverlening en het vertaalresultaat is niet door ons gecontroleerd.
Heeft u meer hulp nodig, neemt u dan contact met ons op.
A laser alignment tool that goes beyond tradition
Smooth Precision Co. Ltd has invested in the XK10 alignment laser system from Renishaw, to remove the limitations of conventional methods, significantly improving the overall alignment accuracy and efficiency of its machines.
Background
For many machinery manufacturers, conventional measurement tools such as dial test indicators, granite squares and autocollimators no longer meet the accuracy, efficiency or flexibility they require. These tools are often seen as not being cost effective, particularly by manufacturers who produce specialist equipment in small volumes.
Laser measurement is therefore becoming more widely used by manufacturers of modern industrial equipment including machinery used in the manufacture of semiconductors, flat panel displays, photovoltaics and other precision equipment.
Smooth Precision is a specialist equipment manufacturer based in Taichung, Taiwan. Established in 2009, the manufacturer develops and produces specialist equipment for processes, such as glue dispensers, pressure testers for smartphones and automation equipment. The company has now become part of the supply chain for market leaders in smart mobile device manufacturing.
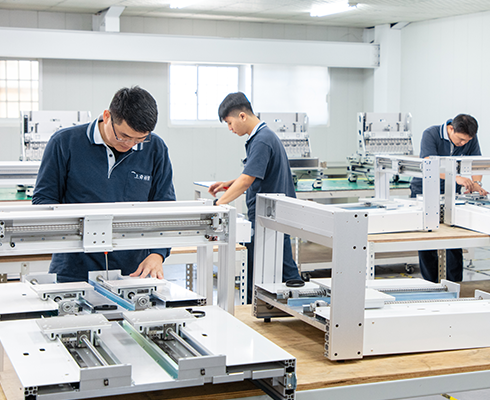
Smooth Precision's specialist equipment production line
Challenges
Traditionally, Smooth Precision used conventional tools for calibration and measurement of machines. Increasing orders and higher customer expectations meant that these tools no longer met the needs of the business.
When using conventional inspection tools, operators can encounter a range of problems. Granite squares, for example, are big and heavy, making them inconvenient for measuring larger machines and impossible to use when measuring a compact machine in a limited space. The size and weight of the granite squares also means it is possible to cause bench damage or cause operator injuries during handling, and they require a large amount of space for storage. Similarly, operators using a dial test indicator to measure the parallelism of rails can introduce greater measurement uncertainty, as two operators could obtain different results, making the method unrepeatable.
Validating machines with conventional tools may lead to inconsistency in results due to varied operator skills and experience. The validation report, a key factor in building mutual trust between the manufacturer and its customers, carries a considerable risk of being lost or damaged if handwritten. Smooth Precision is investing considerable resource into quality control. To improve machine validation and assembly of large machines, Smooth Precision decided to invest in new technology.
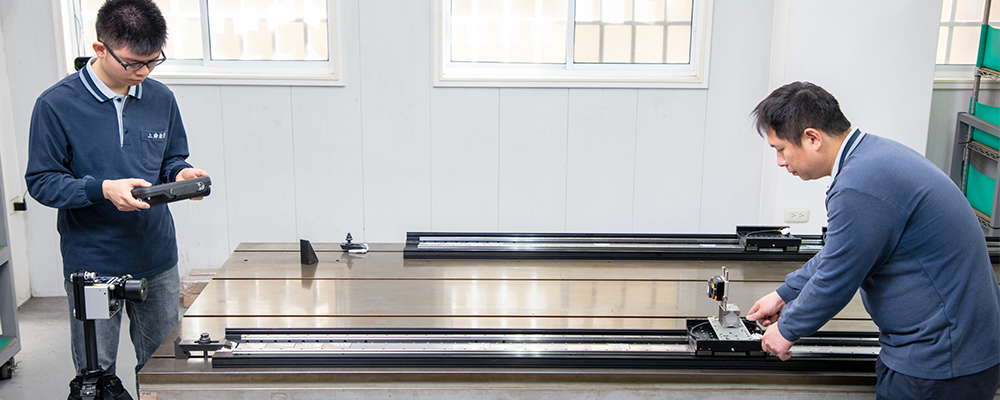
Validation of precision linear stages with the XK10 alignment laser system
Solution
After reviewing potential products, Smooth Precision invested in Renishaw's XK10 alignment laser system. The system has been developed to measure geometric and rotational errors of machine tools. Conducting such measurements during machine build, maintenance and servicing enables accurate alignment and adjustment of machine axes to achieve optimum performance. This reduces time taken during machine assembly processes and on-site servicing, including regular maintenance or following a collision.
“We chose the XK10 as it is easy to install and efficient when measuring the straightness of guide rails and machine flatness,” explained Zhang Qiuming, General Manager at Smooth Precision. “There are no additional optics required to measure squareness or space limitations mounting optics in precision machines.”
“Our strengths lie in our hardware research and development capabilities, with which we can develop custom-made equipment to meet the real demands of customers and provide comprehensive services, from equipment design to mass production,” explained Zhang.
“The XK10 works for a variety of machine sizes and configurations. Its features include wireless communication, a rotating laser transmitter for easy change of beam direction and flatness measurement with grid points. It is easy for users to complete step-by-step installation and measurement using the intuitive software interface. In addition, the automatic analysis can offer immediate results following measurement, with live display of readings for adjustment,” continued Zhang.
We introduced the Renishaw XK10 laser alignment system to further improve the overall accuracy and stability of equipment once assembled. We need to keep abreast of the times and use alignment tools that are more advanced and accurate to gain customers' confidence and keep orders coming in.
Smooth Precision Co. Ltd (Taiwan)
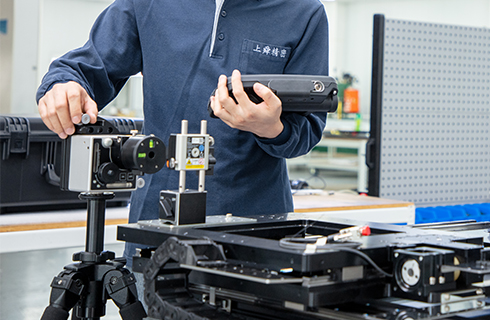
Smooth Precision engineer using a wireless display unit to align the
XK10
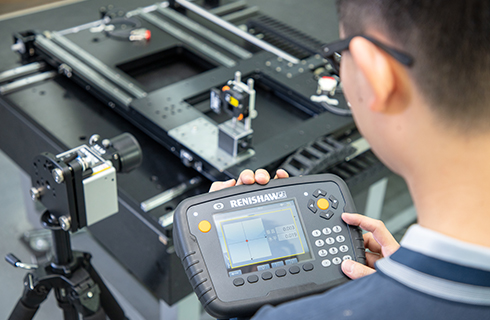
XK10 display unit records measurements and displays instant readings so users can make adjustments on the fly
Results
Smooth Precision now uses a range of Renishaw optical encoders in its own specialised equipment, including RESOLUTE™ absolute encoders, and ATOM™, QUANTiC™ and TONiC™ incremental encoders.
“Renishaw provides a full range of encoders that are highly recognised in the industry. They facilitate our equipment design and help us reassure our customers. We predict that competition will increasingly intensify in the future, in both the precision stage and specialist equipment markets. Smooth Precision will also expand its product lines to answer the greater demands of customers, in addition to maintaining our focus on specialist equipment,” concluded Zhang.
Smooth Precision now uses the XK10 on a variety of machines, due to its wireless communication between modules. The system is also equipped with a fixturing kit to reduce installation time and simplify set up — with the company now reporting that the process takes around 30 to 40 minutes from test set up to inspection.
“It is undoubtedly true that laser measurement is superior to conventional inspection tools in terms of accuracy and installation flexibility,” explained Zhang. “For machine validation or assembling large machines, we need to use the XK10 laser alignment system, especially for machines that require high precision and a sophisticated assembly process.”
