Ez az oldal az Ön nyelvén jelenleg nem elérhető. Az automatikus fordítás a megtekinthető a Google Fordító segítségével.
A szolgáltatás biztosításáért nem vállalunk felelősséget, a fordított szöveget nem ellenőrizzük.
Ha további segítségre van szüksége, lépjen kapcsolatba velünk.
“Huge reductions in inspection time and the ability to measure form”
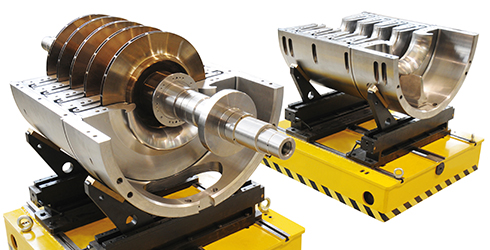
Every year, GE Oil and Gas invites customers to an open house at its factory in Florence, Italy. In 2009, 800 customers saw the results of a GE Oil and Gas New Technology Introduction project - a DEA Global coordinate measuring machine (CMM), retrofitted with a Renishaw REVO® system and measuring impeller parts at a dramatic speed.
As Claudio Bartali (Manufacturing Technology Project Leader) explains “The demonstration was spectacular – inspection time on a typical impeller reduced by 4 times. However, that is not the main reason we started the project and employed Renishaw to retrofit the CMM with REVO. The exciting part will start soon when we use the massive amount of accurate REVO-measured data to compare the form of inspected surfaces with the 3D CAD models.”
The retrofit, performed directly by Renishaw with its own experienced engineers, replaced the previous head, touch trigger probe, DEA controller and PC-DMIS® software with the Renishaw Renscan5™ system - REVO 5-axis scanning head, UCC2 controller and MODUS™ software.
Saverio Chiari (Manufacturing Technology Leader) is delighted with how smoothly it went, “The Renishaw service is very good – they are very focused on customer support and have been very supportive in the changeover to REVO.” With a requirement for 100% inspection, there is a high demand on the CMMs and programming systems, which need to adapt constantly. At the GE plant in Florence, the DEA Global is used to perform dimensional inspections on components varying in size and geometry up to 1000 mm diameter.
The new REVO measurement method
REVO is a contact scanning probe with 2 integral measuring axes, which can work in a true 5-axis measuring mode when using the 3 axes of the CMM, allowing a completely different method of checking impeller dimensions. The top face, for example, is measured with what Renishaw calls a‘ gasket scan', a rapid sweep of the top machined face in about 2 seconds, gathering thousands of points. This compares to the previous method involving four touch trigger points and taking close to 30 seconds. A best-fit calculation of this data allows the software to plot a plane through all the points, confirming the position of the face and its relation to other surfaces. In the near future it is intended to use this large amount of data to calculate if the surface is deformed in any way, and exactly which parts of the face deviate from the ideal CAD model of the component.

Transforming inspection without a new machine
Paolo Trallori (Calibration and Metrology Leader) explains why they chose to retrofit REVO. “We needed a change in inspection capability but not the expense of a new machine. The lightweight REVO head is extremely fast when measuring, with the speed of the machine's axes movement no longer the limiting factor – the machine is often acting just as a ‘carrier' for the REVO. In most circumstances this means inspection moves can be 50 or 100 times faster than before.”
Mr Trallori continues, “Some moves, like scanning the outside diameter of the impeller, are limited by the machine speed, but in this case REVO still reduces overall inspection time. By maintaining constant contact with the surface in one smooth rapid move, rather than moving on and off to take single points, time is still much reduced. And we have gathered thousands of points in that move. Just wait until we start to analyse that data for deviation of the measured surface from the CAD model. We will be able to certify the quality of components in terms of form tolerances as well as simple dimensional tolerances.”
GE Oil and Gas decided to test the accuracy of the new system itself, and performed a direct comparison between the touch trigger method and REVO. “The accuracy of measured points was at least as good, but at considerably higher speeds and while gathering so many more points”, concluded Mr Trallori.
Integration into a flexible production system
As Mr. Chiari comments “You could say we have gone beyond a ‘design for manufacture' system to a ‘design for inspection' system here.” The Renscan5 system has been integrated fully into GE Oil and Gas' production systems, with the Renishaw MODUS software executing inspection moves generated by a Unigraphics CAD/CAM system.
The compatibility of MODUS with DMIS is very important here. The 3D CAD model generated in the design of the component originally is used for everything, including machining the component in the first place, then verifying its quality. Each component is tracked throughout the process by its serial number, with a full record of every stage in its production. Now GE Oil and Gas will be going one step further and will add extra quality data to that record, with the ability to further improve machining operations.
The next stages
The team at GE Oil and Gas are quite clear how they intend to continue the project – by using the scanned data to compare form and by retrofitting more CMMs. A second machine, a DEA Scirocco with less volume for smaller impellers, is currently being retrofitted with a REVO system. Another larger gantry machine, for the very large impeller parts, is also being considered for retrofit. These machines are inspecting other parts from the GE Oil and Gas range, so they will be using the full range of REVO inspection routines.
As Mr Bartali concludes, “REVO has brought us a far better and more comprehensive method of inspection in a shorter time, now we will be implementing quality standards for form measurement, something we could never do before.”
About GE Oil and Gas
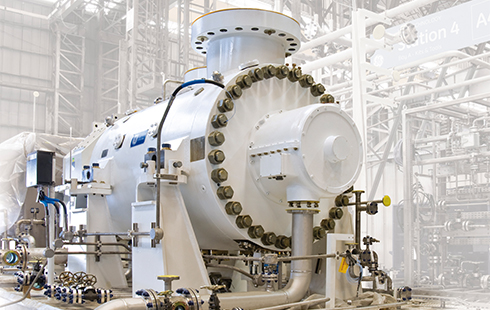
Florence is GE Oil and Gas' business headquarters, with a global installed base of machinery and equipment of more than 20,000 units. Projects include the world's largest LNG compression trains, re-injection of high sulphur gas, enhancing the safety and productivity of the world's oil and gas pipelines, and equipment for the production of oil and gas from deep subsea resources.
GE Oil and Gas is one of the industry's major suppliers of turbines, compressors, pumps, static equipment and metering systems, and is committed to providing customers with the highest quality offerings, driven through a Quality Management System that integrates the GE Six Sigma methodology with ISO 9001 quality standards.
