Ez az oldal az Ön nyelvén jelenleg nem elérhető. Az automatikus fordítás a megtekinthető a Google Fordító segítségével.
A szolgáltatás biztosításáért nem vállalunk felelősséget, a fordított szöveget nem ellenőrizzük.
Ha további segítségre van szüksége, lépjen kapcsolatba velünk.
Greater process stability in large-scale manufacture
Automotive component manufacturers have to guarantee consistently high machining accuracy in large batches. ZBG Zerspanungstechnik Bruck GmbH in Bruck, Oberpfalz, Germany, achieves this with the aid of the NC4 laser tool setting system from Renishaw. With this system, the machining centre checks cutting tools for wear or damage, and also determines their length to compensate automatically for any possible thermal growth of the machines in operation.
Accuracy in large-scale manufacture demands special measures
"Process stability is the major factor in batch production. When you make several hundred thousand parts each year for the automotive industry, every one has to meet the design specifications exactly in terms of geometry and accuracy", said Markus Forster, works manager at ZBG. He is responsible for a total of 42 machining centres. This component manufacturer produces over a million engine and chassis parts on these centres every year which include oilpans and cylinder heads for smaller engines which drive medium-weight motorcycles, all-terrain vehicles (ATVs) and Ski-Doos and also industrial vehicles. The five companies that make up the group employ around 600 people, with around 300 working in machining in Bruck. ZBG also offers surfaces treatment, pressure testing and part assembly of the finished components.
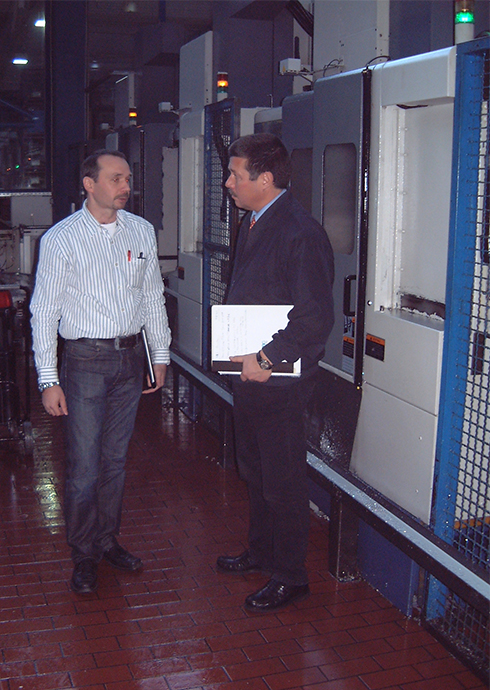
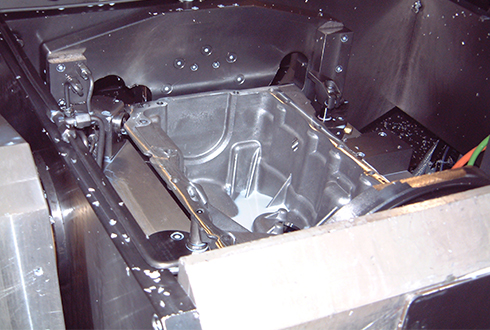
Markus Forster, works manager of ZBG, and Michael Vogt, Renishaw GmbhThere is no doubt that process stability is one of the challenges of batch production. Markus Forster, works manager at ZBG states "Our customers demand consistent quality. In the case of engine components, 10 ppm NOK parts are allowed at best. If accuracies are in the range of one or two hundredths of a millimetre, then special production measures are required". The production engineers in Bruck found that the thermal growth of their machining centres in particular has a significant effect on accuracy and therefore on process stability. For example, they produce oil pans for smaller diesel engines on a linked line comprising five Mori Seiki SV503 machining centres. Holes and bolt-on surfaces have to be machined with accuracies of less than 0.05 mm. It was soon seen that this requirement was not automatically met.
With three-shift operation in particular, significant temperature differences often occurred in the production bay between day-time and night. Subsequent measurements of the finished components on CMMs (co-ordinate measuring machines) revealed inadmissible dimensional deviations. The reason was unexpectedly high thermal growth for the five machining centres.
"An accuracy envelope of less than five hundredths of a millimetre could not be met on our five machines. Temperature differences of a few degrees Celsius in production led to heating-up that could not be reliably predicted. Measuring a large number of components directly from production was a major task for our Quality Control operation. Also, if a defect occurred, we had to re-measure all the components made. That was simply not economical and affected our productivity considerably. Consequently we looked for other concepts", said Forster when presenting the linked production line.


Measuring in the working area
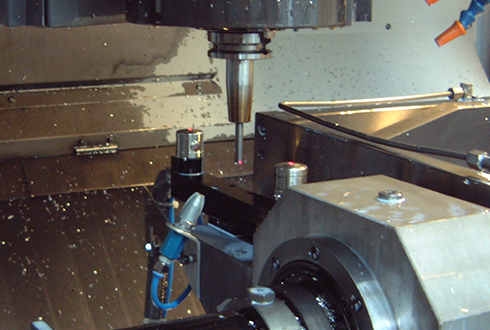
The company has now achieved the necessary process stability with a NC4 laser tool setting system from Renishaw which uses laser light. Different versions of the laser light transmitter and receiver can be built in the working area of the machining centres, either separately, or as a unit already configured and adjusted on a supporting bracket. A special model with a distance of just 23 mm between light transmitter and receiver is available for small machining centres. Lengths and diameters can be determined for tools that are larger than 0.03 mm. The laser measuring system achieves accuracies down to less than 1μm. In this case, the software in the corresponding interface also eliminates potential errors caused by coolant droplets. The measuring system is protected against environmental influences, such as chips and coolant, according to IPXX8. In addition, an air flow with high issue speed (MicroHole™ technology) prevents fluids or particles from being able to penetrate the light source and the receiver.
Unsupervised processes become more secure
ZBG makes great use of the versatile tool measuring system. To meet the accuracies required, they measure the thermal growth of the machining centres in the working area at statistical intervals, e.g. after every tenth machined component. To do this, the machining centre introduces a precision pre-set tungsten bar of known length into the main spindle as a reference tool. It moves the bar into the visible red laser light beam where the NC4 measuring system picks up the length of the reference tool to within a few µm and transfers the data to the NC control system. The control system calculates the correction data for the zero point of the NC programs and updates the machining centre's control system. Forster: "In this way, we make sure that we adequately compensate for the thermal growth of the machines even in unsupervised production periods, and can therefore guarantee optimum process stability and achieve the required quality assurance of 10 ppm NOK parts maximum".
Additional measuring cycles also increase stability
Working in liaison with Renishaw's application engineers, the job planners at ZBG are also devising additional applications for the NC4 tool setting system which will further increase process stability in batch production. For example, a broken tool can be detected with the laser measuring system within very short cycle times so the NC programmers have planned measuring cycles after machining and before returning the tool to the magazine, particularly in the case of thin tools with small diameters, which are particularly sensitive to breakage. The machine operator can then replace these tools in good time.
In future, the job planners also want to detect and check the diameters and geometries of selected tools with the aid of the NC4 tool measurement system. They are mainly interested in taps and by scanning them with the laser beam, the measuring system is able reliably to detect the tip geometry, i.e. the start of the tap. In future, ZBG wants to measure and check small taps every time they are introduced into the main spindle. The aim is to prevent taps without a tip from entering the bores and producing incomplete threads, or even breaking off completely and becoming jammed. This short and simple measuring cycle will therefore increase process stability even further. In addition, an unsupervised operation can run without any risk of the workpieces being machined incompletely or being damaged during production.


