Ez az oldal az Ön nyelvén jelenleg nem elérhető. Az automatikus fordítás a megtekinthető a Google Fordító segítségével.
A szolgáltatás biztosításáért nem vállalunk felelősséget, a fordított szöveget nem ellenőrizzük.
Ha további segítségre van szüksége, lépjen kapcsolatba velünk.
Do you trust your co-ordinate measuring machines? Take Messier-Dowty’s lead and actively monitor CMM performance
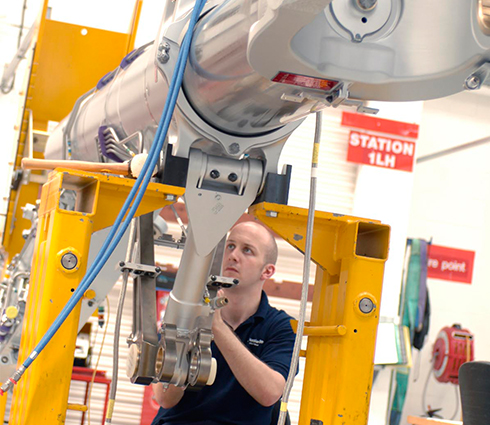
Messier-Dowty, a SAFRAN Group company, designs and manufactures landing-gear systems for the world's best-known commercial airliners, jet fighters and military transport aircraft.
Trusting your CMM
Messier-Dowty, a SAFRAN Group company, designs and manufactures landing-gear systems for the world's best-known commercial airliners, jet fighters and military transport aircraft. In an industry sector well known for its commitment to quality, Messier Dowty has a control procedure for almost everything; even monitoring the accuracy of its co-ordinate measuring machines (CMMs).
Organisations such as Messier Dowty don't take chances with quality; they invest in the very best co-ordinate measuring machines (CMMs) and have strict quality control procedures for checking the accuracy of those machines.
But why is it necessary to periodically check a high-precision measuring device such as a modern CMM? For exactly that reason: because it is a high precision device and because occasionally its accuracy can be compromised by environmental factors and excessive or heavy use.
If you own a high performance car or motorcycle, it almost certainly has an on-board computer that continually monitors the vehicle's performance. If it detects an engine anomaly, a light or message will alert you to the problem, often recommending that you contact the service centre at the earliest opportunity.
In a way, that's exactly what the Renishaw Machine Checking Gauge (MCG) is designed to do. It gives owners of CMMs the ability to regularly ascertain the performance of their investments, alerting them to accuracy problems before they impact manufacturing or quality control processes.
CMM accuracy
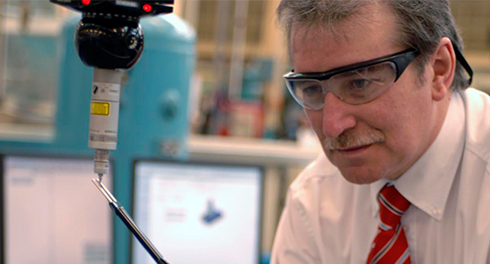
Messier Dowty takes the matter of CMM accuracy very seriously, which is the reason why Pete Willis, a Principal Engineer within the manufacturing engineering department at the Gloucester facility, has established a regular and thorough program of checks for the company's seven measuring machines.
"Before we invested in a Renishaw MCG we had no way to monitor the accuracy of our CMM machines, we were unable to understand the impact on performance related to our specific working conditions. The consequence of not having this appreciation meant that we could not determine the appropriate interval for service and calibration; we were totally dependent on the recommendations of the CMM supplier".
Part of the challenge at Messier Dowty is that its CMMs are located on the factory floor, rather than in clean-room environments. What's more, they're worked for three shifts a day, often 7 days a week.
"We don't have any complaints with the machines themselves," states Mr. Willis. "On the contrary, problems are normally caused because we work them very hard and because they're susceptible to environmental conditions. Operational and environmental factors gradually degrade the performance of components like the air bearings, and ultimately the accuracy of the CMM."
The Renishaw MCG is a straightforward test that allows users to check the volumetric accuracy of a CMM, whatever its size.
Based on a simple alternative to the widely used 'Ball-bar principle' - typically used to check the accuracy of machine tools - the Renishaw MCG provides fast, automatic machine evaluation in accordance with ISO 10360-2, the international standard for the acceptance and re-verification of co-ordinate measuring machines.
Volumetric Performance
A counter-balanced arm of known length is located at one end on a stationary, freestanding pivot positioned on the CMM table. The pivot allows the arm to rotate very accurately through 360° horizontally and +/-45° vertically. Each MCG comes with 6 arms, from 101 mm to 685 mm in length, and pillars from 72 mm to 235 mm in height.
The other end of the arm comprises two parallel guide rods with sufficient clearance between them to allow the CMM probe to move towards the pivot position, taking a radius measurement as the probe stylus ball contacts a ball attached to the end of the arm. As the arm is a known length, any discrepancy between this length and the measured CMM value can be calculated.
A standard test provides for 8 measurements at each of 0°, 45°and -45° arm elevation, giving a total of 24 points. The process is repeated three times to allow for machine repeatability, producing 72 results in all.
As the volumetric measuring performance of the CMM is the maximum error between any two points in any plane, over any distance within the full measuring volume, the test can be performed at multiple locations around the machine table.
Mr Willis says "As part of the ISO 10360 standard which defines the process of CMM verification, we use the Renishaw Machine Checking Gauge to perform the interim verification requirements. Following each ISO 10360 calibration of the CMM the MCG is used to capture and record performance values, these results serve as the reference standard against which deterioration in the machine's performance can be determined.
The MCG is used monthly and the results are graphed to visualize the effects of any changes taking place. Additionally, in line with ISO 10360 requirements, a probing system verification routine is performed each week. The Machine Checking Gauge is also a major benefit if we have an unexpected collision on the machine; with the Renishaw MCG we can quickly understand any effect this has had on machine performance and confidently decide if we can continue to use the machine.
Users of the Renishaw MCG can download test programs and analysis software from the company's website.
"By graphing the results, we can watch the machine accuracy deviate at the end of each month," says Mr Willis. "If the machine deviates too much too soon, we stop using the CMM and call the calibration company to re-qualify the machine."
Users can also save and archive MCG data to the Renishaw server, allowing them to compare results over the lifespan of a machine.
Thorough
Whether you're running the household accounts or a multi-million pound business budget, you're probably familiar with the adage look after the pennies and the pounds will look after themselves. Of course, anyone who works in the aerospace sector knows that quality does indeed start and finish with the details. In fact, few industries are as detailed obsessed.
As its batch sizes are small – often less than 4, and frequently just one-off -Messier Dowty checks all of its machined parts for dimensional accuracy. Pete Willis is unequivocal about the importance of detail and control and the need to regularly check the company's CMMs.
"In aerospace, parts and systems are becoming much less fault tolerant, so we can't afford to leave anything to chance. A CMM that gives spurious results could, ultimately, have catastrophic consequences."


About Messier Dowty
Messier-Dowty, a SAFRAN Group company, is the world leader in the design, development, manufacture and support of landing gear systems. Messier-Dowty landing gear are in service on more than 19,000 aircraft making over 30,000 landings every day. The company supplies 30 airframe manufacturers and supports 750 operators of large commercial aircraft, regional and business aircraft, military aircraft and helicopters. Messier-Dowty is also the majority shareholder of the worldwide MRO network, Messier Services. Messier-Dowty and Messier Services together have 4,000 employees across sites in Europe, North America and Asia, and posted consolidated sales of roughly 734 million euros in 2005.