Bu sayfa şu anda sizin dilinizde mevcut değildir. Google'ın Çeviri sistemini kullanarak
otomatikleştirilmiş çeviriye
ulaşabilirsiniz. Bu hizmeti sağlamaktan sorumlu değiliz ve çeviri sonuçları tarafımızdan kontrol edilmemiştir.
Eğer daha fazla yardıma ihtiyaç duyarsanız lütfen
bizim ile temasa geçiniz.
Renishaw technology helps Breton calibrate its in-house machinery and control the quality of its output
When Breton SpA wanted to add machine tool manufacture to its core business of building stone-processing machinery, the increase in required levels of precision prompted the introduction of around 30 devices from Renishaw, including laser interferometers, rotary axis calibrators, ballbars and touch-trigger probes. As a result, Breton's range of high-speed, five-axis CNC machining centres are now among the world's most advanced.
Background
Based in Castello di Godego, Italy, Breton SpA has come a long way since its foundation in 1963. Focussing initially on designing and building machinery to process natural stone, the company soon transitioned into also producing complete systems for the manufacture of composite stone (7% polyester content). This innovative material had, in fact, been invented by Breton and proved the backbone of its growing business for many years.
The 1980s saw Breton begin building CNC machinery for processing marble, granite and composite stone slabs aimed at the kitchen worktop and bathroom sector. This particular era also included the arrival of the company's first five-axis systems.
A decade down the line and Breton began to diversify its expertise into the production of high-speed CNC machining centres for the metal-cutting industry. The company became a leading worldwide player in this market within just a few years, based on an ethos of research, continuous improvement, innovation and quality products. This latter point is underpinned by Breton's reliance on Renishaw technology to ensure the quality and precision of its in-house production machinery, and its range of commercially available machine tools.
Prior to adopting the latest technology from Renishaw, Breton calibrated its machine tools before shipment using the ML10 laser for linear compensation of CNC axes, and a laser system from another supplier to capture straightness data on machine guides. However, Breton experienced several problems on axes over four meters, where metrology data was inconsistent.
Challenge
Switching from processing stone materials to metals demands a significant increase in precision. Samuele Salvalaggio, Sales Engineering Office, explains how Breton's own production machines, as well as those the company builds, follow practically the same control and calibration procedures.
“You cannot produce precision machinery if the components are not produced using precision machinery,” he stated. “Our quality control methodology essentially encompasses three phases: linearity control, the checking of axes, and overall control of kinematics, which are all carried out using Renishaw products.”
The rotary axis test, carried out with Renishaw's XR20-W, is much better now because unlike our previous control methods, Renishaw uses a reliable interferometric approach to make these tests. The assistance, support and technical approach supplied by Renishaw had a major role in helping us to reach our goals.
Breton S.p.A. (Italy)
Solution
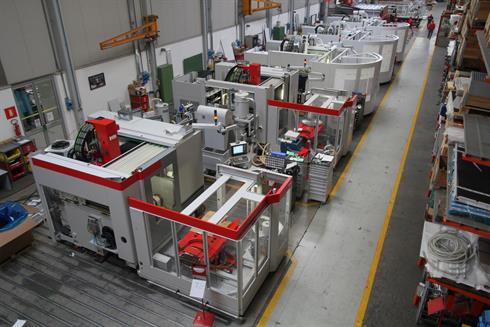
The various Renishaw products at Breton include laser interferometers, rotary axis calibrators, ballbar systems and touch-trigger probes, which are distributed throughout the in-house quality and technical support departments.
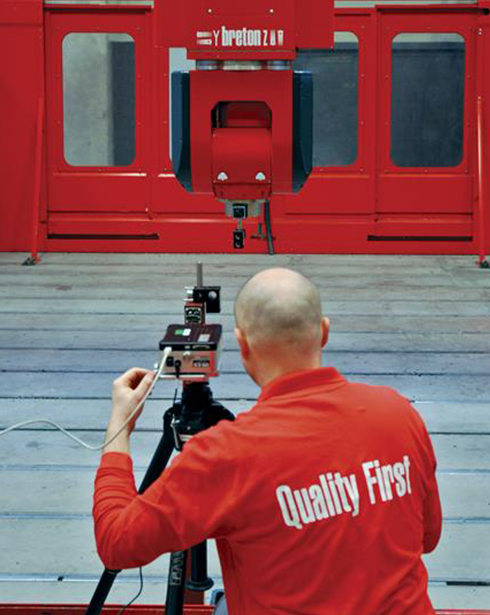
Once a machine is assembled, a XL-80 laser calibration system is used to test the positioning, linearity and the angular errors of the machine tool. These controls are carried out on all the machine tools produced by Breton. This process is also performed annually on all in-house production machinery and repeated on the rare occasion that deviations are recorded. The company opted for the XL-80 system after experiencing difficulties using other systems on axes over four metres, a problem which is non-existent with the XL-80.
The Renishaw XR20-W rotary axis calibrator is used to check rotary axis errors, “The rotary axis test, carried out with Renishaw's XR20-W, is much better now because unlike our previous control methods, Renishaw uses a reliable interferometric approach to make these tests. The assistance, support and technical approach supplied by Renishaw had a major role in helping us to reach our goals”, said Samuele Salvalaggio.
Machine axes are also the subject of strict quality control routines facilitated by using a Renishaw QC20-W ballbar system. The QC20-W is used to quantify the squareness between each linear axis and to check a machine tool's fundamental positioning performance via a quick check.
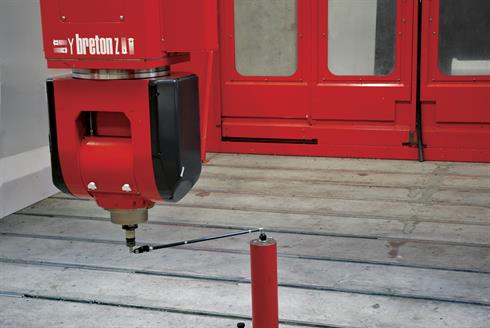
Once staff in the maintenance division, who already used a ballbar system for their periodic checks, showed others how easy to use and accurate the system was, it became a standard tool in every part of the company needing calibration controls.
Among other things, this check is also the first one conducted when customers request technical support for machines installed in the field. At Breton's 40,000 m2 premises, checking the three linear axes of in-house production machining centres is also a straightforward operational routine. In just 20 minutes the operator can check the condition of the machine and prevent possible manufacturing errors. The ballbar system is now used internally to calibrate the production machines and externally for technical support, particularly when a customer suffers a machine collision.
Results
At Breton, which today employs around 700 people, core business remains the stone processing sector, and here too, despite the fact that precision levels are lower, the benefits of calibration are now fully appreciated. All of Breton's machines for natural/compound stone processing undergo calibration routines which guarantee their optimum operation.
