Bu sayfa şu anda sizin dilinizde mevcut değildir. Google'ın Çeviri sistemini kullanarak
otomatikleştirilmiş çeviriye
ulaşabilirsiniz. Bu hizmeti sağlamaktan sorumlu değiliz ve çeviri sonuçları tarafımızdan kontrol edilmemiştir.
Eğer daha fazla yardıma ihtiyaç duyarsanız lütfen
bizim ile temasa geçiniz.
Ballbar diagnostics aid airframe manufacture
Without periodic checking and maintenance, CNC machine tools can lose positioning accuracy and introduce errors over time. Machining complex, high-value airframe components, BAE Systems turned to a wireless ballbar system to provide the machine tool diagnostics data it needed to maximise quality and productivity.
Background
The manufacture of airframe components for modern aircraft demands precision and consistency. With the lifetime expectancy of a component matching that of the aircraft, production quality and reliability are paramount concerns in metal and composite machining processes.
BAE Systems, the global defence, aerospace and security company, produces vital airframe components for the Eurofighter Typhoon, a twin-engine, canard-delta wing multirole combat aircraft. Entering operational service in 2003, this highly agile aircraft is flown by various air forces around the world.

At its state-of-the-art manufacturing facility at Samlesbury Aerodrome near Blackburn in United Kingdom, BAE Systems operates more than 80 CNC machine tools, each tasked with producing a wide range of high-value, short-run airframe components for the Typhoon and other aircraft.
Maintaining the performance and throughput of 5-axis machine tools, in order to ensure consistent part quality, minimise material wastage and maximise manufacturing efficiency, is a key responsibility for the company's production line staff.
Periodic CNC machine tool inspection and calibration checks are therefore vital. For this purpose, BAE Systems had already used Renishaw's QC10 ballbar machine tool diagnostic system. BAE Systems turned to the second generation wireless system to add greater flexibility and ease of use.
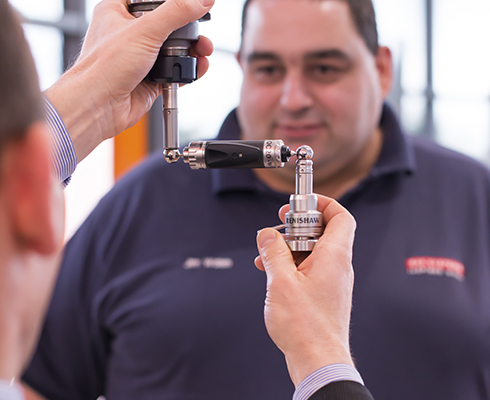
QC20-W ballbar system
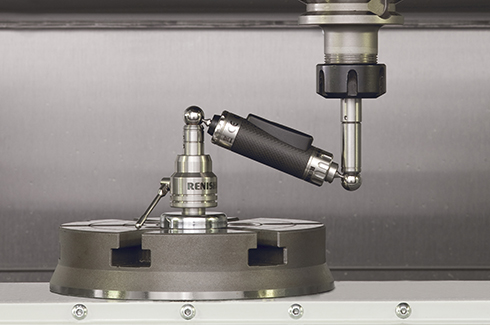
If a CNC machine tool's positioning performance was perfect, then its circular interpolation - in any two-axis combinations - would precisely match a programmed circular path. The QC20-W wireless ballbar provides the means to compare the actual and programmed paths to determine the presence of errors.
Containing a high accuracy linear transducer, the telescoping ballbar is located between precision magnetic cups; one mounted on the machine table, the other on the machine tool spindle. In this arrangement the ballbar is able to measure minute variations in radius as the CNC machine tool follows a programmed circular path.
Signal processing is carried out within the ballbar and data is transmitted to a PC using a wireless connection. The data gathered is used to calculate overall performance of positional accuracy (circularity and circular deviation) in accordance with international standards and Renishaw's own standard analysis reports.
The ballbar data is displayed in both graphic and numeric formats to further aid machine tool error diagnosis. The ballbar kit includes 50 mm, 150 mm and 300 mm extension bars to cover a wide range of CNC machine tool diagnostic tests.

With the help of Renishaw ballbar diagnostics, a dormant CNC machine tool has been brought back to life, and BAE Systems has benefitted from significant improvements in workshop productivity and QA compliance.
BAE Systems (UK)
Challenge
Irrespective of its type, specification, workload and duty cycle, even the best CNC machine tool may see its positioning accuracy degrade over time and introduce errors if it is not maintained. Wear and tear, damage from collision, incorrect installation, even the influence of foundation-borne vibration and ambient air temperature can all have adverse effects.
Identifying a problem with a machine tool after components have been machined can be costly. In the case of BAE Systems' airframes, a high percentage of components are machined from titanium. This high-strength, lightweight, high temperature and corrosion-resistant metal is high in value and increasingly scarce, with stocks needing to be reserved up to a year in advance.
As well as the cost of scrapping high-value material, the loss of CNC machine time caused by machine tool errors can be hard to reclaim.
A complex titanium airframe component can typically demand 40 hours of machine time to produce. Repeated production of scrap components can have a severe impact on machine productivity.
Of particular interest to BAE Systems' manufacturing engineers was a machine tool that little-by-little had lost the confidence of machine shop personnel to produce accurate parts. Increasingly failing to produce parts within specification, this problematic machine tool was becoming sidelined, and its workload re-routed to other machines.
In the face of such challenges, the performance of a CNC machine tool needs regular checking. Maintaining the machine tool's positioning accuracy is paramount to achieving quality and productivity targets.
Solution
To assist with periodic CNC machine tool performance diagnostics, BAE Systems had previously used Renishaw's QC10 ballbar system to identify specific machine tool performance errors.
Moving on to adopt the second generation QC20-W wireless ballbar, the company initiated a site-wide preventative maintenance program to check 60 CNC machine tools on a defined weekly, monthly and annual basis.
Through detailed interpretation of the QC20-W's diagnostic data trends across all machine tools, BAE Systems established a dependable go/no-go error margin benchmark, against which all machines' performance could be quickly checked. Any circularity error in CNC machine positional accuracy greater than 30 µm would demand immediate investigation.
The efficiency with which ballbar-trained machine tool operators could run diagnostic checks using the QC20-W meant they could be completed between part production runs with little adverse effect on machine tool throughput.
The optimum ratio of ballbar test kits to CNC machine tools was also determined. A ratio of 1:15 was found to accommodate a ballbar leaving site for its annual calibration check, and multiple ballbar checks happening simultaneously across the machine shop.
With the knowledge and experience BAE Systems had gained from applying the QC20-W ballbar to an array of different machine tools, it was in a position to take a much closer look at its one problematic machine tool, which had effectively been removed from service.
Using the ballbar, a XY circularity error of 200 μm was observed. Using the ballbar diagnostic software the dominant failure mode was identified as servo mismatch followed by a significant backlash error. The servo mismatch was rectified by BAE Systems maintenance engineers who optimised the X axis drive parameters, using the ballbar as a checking tool to quantify the improvements gained by the various adjustments.
Once the servo mismatch had been eliminated there was still a significant error that was diagnosed, again, using the ballbar along with traditional gauge measurements, as X axis ball screw wear. Once the ballscrew had been refurbished and the backlash compensation re-set the machine tool was able to satisfy the XY circularity requirement of 30 μm and returned to error-free service.
Jim Walsh, Specialist Manufacturing Engineer, BAE Systems commented, “Making ballbar testing an integral part of machine tool healthchecks has not only helped ensure consistent part conformity, it's also given us the ability to be able to return a machine tool previously deemed unproductive to full operational service.”
He continued, “Using the ballbar's diagnostic software to automatically interpret results and diagnose errors also means machine operators are effectively freed from having to calculate from first principles what the data really means, where the problem lies and how it can be remedied. This helps save a lot of time in component production.”

Results
Including the QC20-W wireless ballbar system in a dedicated CNC machine tool preventative maintenance program has helped BAE Systems to comprehensively address one of the many challenges presented by the machining of high-value, short-run airframe components.
Aided by enhanced ballbar diagnostics, the company's already proactive approach to reducing material wastage and increasing productivity has been reinvigorated. The root causes of CNC machine tool errors are identified well before they become a significant problem; there is no waiting for a problem to occur.
Machine tool error diagnosis at BAE Systems has become virtually instant. Unacceptable machine tool down-times - the result of lengthy and expensive investigations and repairs - have been drastically reduced and the machine builder is no longer depended upon as the sole source of technical insight and support.With the help of Renishaw ballbar diagnostics, a dormant CNC machine tool has been brought back to life, and BAE Systems has benefitted from significant improvements in workshop productivity and QA compliance.


