Denna sida finns för närvarande inte på ditt språk. Du kan
översätta
den automatiskt
med Google Translate. Vi ansvarar inte för att tillhandahålla denna tjänst och
vi har inte kontrollerat översättningsresultaten.
Kontakta oss om du behöver ytterligare hjälp.
Industrial probes aid research in space
As a result of new developments in the theoretical knowledge of the very smallest particles on the planet, some physicists are now calling into question the principle of equivalence of inertial and gravitational mass into question.
To examine these ideas, production specialists at the National Metrology Institute of Germany (PTB) in Braunschweig developed cylindrical test masses, achieving an accuracy of 2 µm to 3 µm for all geometric characteristics.
This feat of engineering was only possible thanks to a measurement solution that combined a high-precision lathe from Benzinger with an OMP400 probe from Renishaw.
Background
For engineers, producing components to an accuracy of 2 µm to 3 µm is now a relatively realistic prospect. But Dr Daniel Hagedorn, Project Lead and Manager of PTB's Surface Metrology working group, knows that there are limitations to the technology: “The machines we have today can achieve positioning accuracies of 2 µm to 3 µm in one or two directions without any difficulties at all. But for our test masses, we needed to achieve this high level of precision in all three dimensions — not only at individual positions, but also on planes, cylinder surfaces and in angles”.
PTB was commissioned to produce ten cylindrical test masses for MICROSCOPE (Micro-Satellite à traînée Compensée pour l'Observation du Principe d'Equivalence), a 300 kg minisatellite operated by CNES, the French government space agency. Together with other partners, including the European Space Agency, MICROSCOPE will test the universality of the equivalence principal.
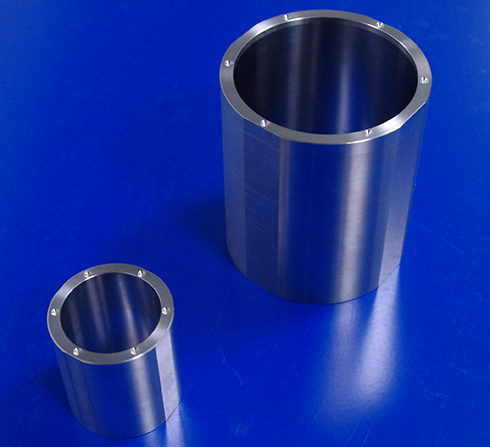
Each of these masses is around 80 mm in length; the larger cylinders have an outer diameter of 70 mm, while the smaller examples measure just 35 mm.
Manufactured in platinum-rhodium (PtRh10) and a titanium-aluminium-vanadium alloy (TiAl4V6), the cylinders are placed concentrically inside a differential accelerometer for testing.
This configuration ensures that the moment of inertia of both cylinders is on the same axis. The PtRh10 cylinders serve as reference; the others, made from different materials, are subject to acceleration measurement to verify whether the equivalence principle of gravitational and inertial masses remains valid at a measurement accuracy of 10-15 µm.
As we had planned, we were able to achieve ± 1 µm accuracy for all characteristics. This high-precision machining has a significant impact on whether or not scientists may need to rethink the accepted laws of physics. The accuracy and reliability of the Renishaw OMP400 probe was a key factor in our success.
National Metrology Institute of Germany (Germany)
Manufactured from start to finish in a single, uninterrupted process
Manufacturing the test masses to the required level of accuracy proved an immense challenge. Before production could commence, the engineers needed to optimise the processing tools for the task at hand. The platinum-rhodium alloy workpieces in particular were susceptible to individual grain breakages if machined with conventional tools, resulting in a surface that was not usable for the intended purpose. Specially eroded diamond tools proved a reliable solution when machining high surface roughness, achieving an accuracy of less than 0.2 µm.
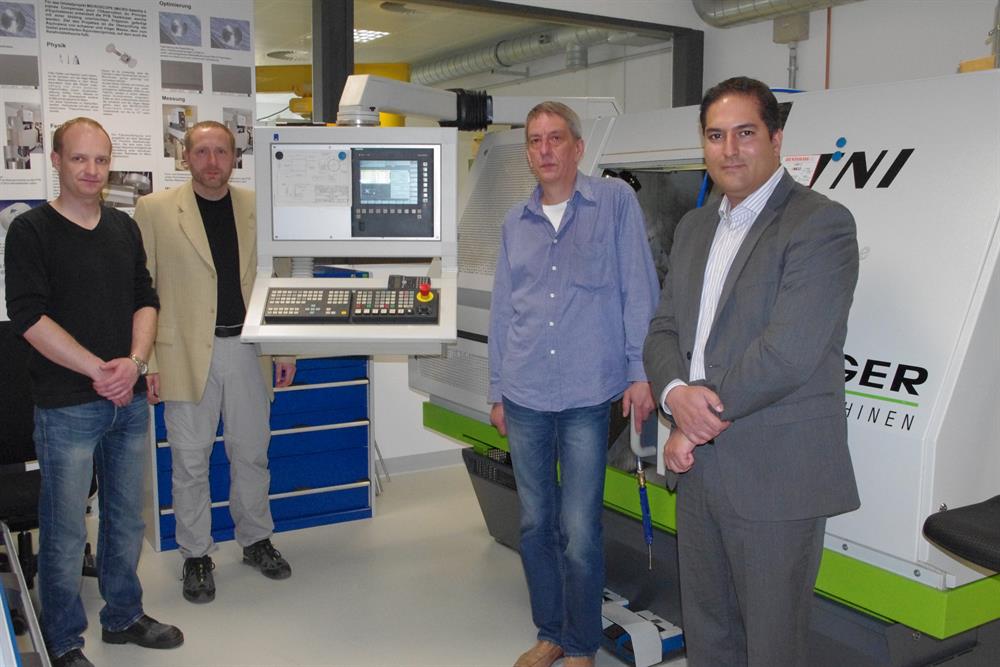
However, as Heinz-Peter Heyne and Stephan Metschke from the Scientific Instrumentation design team quickly realised, it would only be possible to achieve the required level of precision if the entire production process was completed in one step, without removing and reclamping the workpieces. For this reason, the hollow cylinders were processed on a high-precision TNI Preciline lathe from Benzinger. Individual dimensions were also measured on the machine between the production steps, without removing and reclamping the workpieces. In spite of the high-precision clamping device and the team's careful work, deviations of up to 0.01 mm were evident in repeated process attempts.
To complete the entire process to the required level of accuracy, the specialists at PTB needed to integrate high-precision measurement directly into the machining process. The key aim was to eliminate the uncertainty and inaccuracy resulting from the shared starting point during processing and measurement.
To achieve this, Dr Hagedorn tested a number of industrial measurement solutions from different manufacturers.
He focused on comparing and assessing the accuracy and repeatability of measurement results in the working area of the lathes. “We concluded that the only solution capable of meeting these standards would be a high-precision probe like the Renishaw OMP400”, he explains, summarising his results.

OMP400 probe achieves 1 µm accuracy following verification
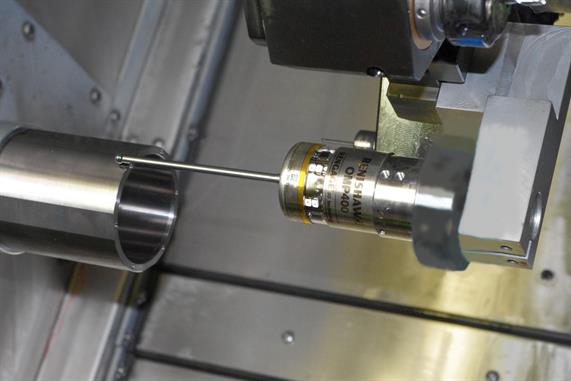
The OMP400 probe uses a measurement system based on strain gauge technology. The probe responds to even the lightest contact forces, is not affected by reseating forces and minimises the hysteresis commonly seen in measurement applications — enabling it to easily achieve accuracies of less than 5 µm. A special measurement routine prevents inaccuracies arising from the probe contacting the surface too quickly. If the software detects interference caused by probe vibration, it stops contact or prevents the recording of a measurement value. As Heinz-Peter Heyne knows, it is only possible to obtain reliable measurement results if the measurement positions are approached at an appropriate speed. By combining this technology with just a few other measures, he was able to reliably maintain the repeatability of the probe within 1 µm.
The probe transmits recorded measurement data optically, and therefore wirelessly, to a receiver in the working area of the lathe. The CNC control system receives this information via an interface and uses it to control and adjust the ongoing measurement process. In addition, the PTB team has developed a special software solution that enables them to transfer the measured values to a server for evaluation and documentation.
The PTB specialists applied a complex verification process to check the results of the OMP400 probe and high-precision lathe solution. After machining a number of contours, they measured the results on the machine itself and on a co-ordinate measuring machine.
Calibrated reference workpieces were also measured on the processing machine using the probe and on the external co-ordinate measuring machine.
The team compared all of the measurement results to obtain compensation data. This data was used to update the high-precision lathe's CNC control system when performing measurements using the OMP400 in the working area and when machining contours.
As proven when comparing multiple workpiece measurements with measurements from the co-ordinate measuring machine, it was possible to achieve measurement accuracy within 1 µm once the probe had been calibrated in this way and the compensation data had been applied to the measurement processes on the lathe in the machining sequence (in-situ, in-process measurement).
To measure roundness and diameter, the probe recorded data for more than thirty circular measurement points.
Cylindricity was measured following a similar pattern, based on five circular measurements over the entire length of the cylinder. The measurement of the six ball indentations on the front face of the cylinder proved particularly challenging. These indentations are designed to act as bearing points when the cylinder is placed in the differential accelerometer. These ball indentations have a maximum diameter of just 1.2 mm. Heinz-Peter Heyne developed a special silicon-ceramic probe stylus measuring just 0.3 mm in order to measure these points.
Iterative design with multiple processing steps to achieve ±1 µm accuracy

After producing multiple workpieces for testing and comparison, Heinz-Peter Heyne manufactured the final test masses in Pt-Rh and TiAl4V6 using an iterative process. He machined the outer diameter of the workpiece on the high-precision lathe to an oversize of around 0.01 mm in multiple steps.
After taking and recording the measurements using the OMP400 probe, he machined the component to its final dimensions. Dr Hagedorn proudly reports that this method was a success from the very first attempt. “As we had planned, we were able to achieve ±1 µm accuracy for all characteristics.
The accuracy and reliability of the Renishaw OMP400 probe was a key factor in our success. Considering that the required quantities of our raw material platinum-rhodium alone cost tens of thousands of euros, we are very pleased with these results”, he says in conclusion.
Equivalence principle
As early as 1636, natural scientist Galileo Galilei claimed that inertial and gravitational masses are always equal. This theory went on to become the foundation for virtually all concepts in physics that we hold true today, including Einstein's theory of relativity.
The theory states that a mass will always respond in the same way, regardless of whether a gravitational or acceleration force is acting on it. Or, to put it simply: In a vacuum (to eliminate the effects of air resistance), a chunk of lead and a feather will take the same amount of time to fall to the ground from the start of acceleration.
However, the latest research on the smallest particles on our planet indicates that the equivalence principle may no longer apply if measured at a sufficiently high accuracy of less than 10-12 µm.
The European Union's MICROSCOPE world space mission aims to clarify these questions.
Away from the influence of ‘earthly' interference, two masses of exact, known dimensions made from materials of different densities will be cast into the zero-gravity, high-vacuum environment of space. High-precision accelerometers will measure their responses. PTB in Braunschweig has produced the cylindrical masses for this experiment.
Thanks to the high level of precision achieved during manufacture - 1 µm to 2 µm for the dimensions, evenness, (co-)cylindricity, parallelism and angularity of all adjacent surfaces of the cylinder - the dimensions of the masses could be determined to an accuracy of up to 10-15 µm. As a result, physicists in the space laboratory are able to measure the responses of the different cylinders to the acceleration force to these exceptional levels of accuracy. If they identify differences in the responses, this experiment could trigger a revolution in thinking on solid-state physics.


