Tato stránka není v současné době k dispozici ve vašem jazyce. Automatizovaný překlad můžete zobrazit pomocí nástroje Google Translate. Neodpovídáme za poskytování této služby a výsledky překladu jsme nekontrolovali.
Potřebujete-li další pomoc, kontaktujte nás.
QC20-W ballbar system boosts confidence in pre-owned machine tool sales
Any company buying a used machine tool needs to be certain of its ability to deliver the accuracy demanded by its manufacturing process. For many companies, pre-purchase condition-checking by a certified machine inspector and thorough static accuracy measurements are not enough. More rigorous dynamic accuracy measurements are also needed. Machine tool seller U-MACHINE adopted a Renishaw QC20-W ballbar system to provide its customers with the additional analysis they required.
Background
The cost of brand-new machine tools can make pre-owned machine tool procurement an attractive proposition for many companies. Provided that they still deliver the precision and speed required by a manufacturing process, high-quality used machine tools can represent a sound alternative investment.
Checking the condition of a used machine tool prior to purchase is, of course, vitally important. While a pre-owned machine tool's maintenance record, power-on time and cutting time figures may be useful in gauging working lifetime and life expectancy, knowing its machining capabilities and dimensional accuracy is very important. The purchaser needs to be as certain as possible that the maximum deviation in a finished part produced by the machine during the machining process falls within acceptable production limits.
One of Japan's leading providers of quality refurbished machine tools is U-MACHINE. Stocking more than 600 pre-owned machine tools, the company operates 5 large warehouses in Japan and another in Thailand. Its vast inventory of pre-owned machines include vertical and horizontal CNC machining centres, lathes, milling machines, grinders and electrical discharge machines.
In order to maintain the condition of their machine tools, U-MACHINE periodically powers-on and operates the machines in their care. Customers can visit the U-MACHINE warehouses to operate and inspect potential purchases first-hand. To provide customers with greater assurance in their used CNC machine tool purchase, comprehensive static machine tool accuracy inspections were also carried out by U-MACHINE engineers and the results openly shared with customers.

U-MACHINE Inc.
Challenge
Whether brand new or used, the performance of CNC machine tools depends on two factors: machining accuracy and machining speed. Increasing machining speed will increase production throughput, but can risk reducing machining accuracy due to servo mismatch, wear and tear, vibration or other environmental factors.
This close relationship between machining speed and machining accuracy means that for an increasing number of used machine tool customers, a static accuracy measurement was insufficient. Made at low or no speed, static accuracy measurements are unable to consider errors introduced by rapid machine motion. Dynamic accuracy measurements are required.
To be able to offer their used machine tool customers the added assurance of a dynamic accuracy measurement, U-MACHINE therefore needed to identify a proven solution that would deliver the additional performance results being demanded.
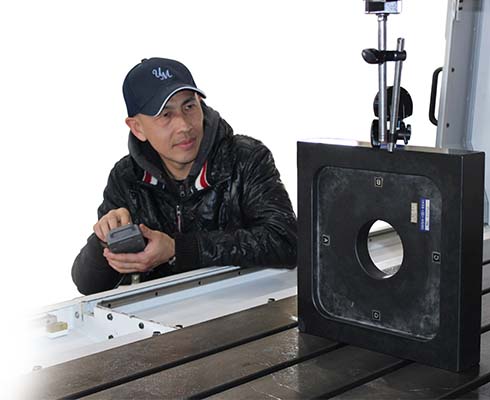
U-MACHINE engineer making precision measurements
By using Renishaw's QC20-W ballbar system, we are now able to complement static accuracy measurements with comprehensive dynamic accuracy measurements that provide our customers with increased assurance in making used machine tool purchases.
U-MACHINE (Japan)
Solution
To introduce dynamic accuracy checks on its pre-owned CNC machine tools, U-MACHINE chose to use the Renishaw QC20-W wireless ballbar and companion Ballbar 20 diagnostic software to carry out circularity measurements. This simple measurement technique is founded on the principle that if a CNC machine tool's positioning performance was perfect, then the actual circle traced out by the machine would exactly match the programmed circular path.
Any errors due to lateral play, backlash and servo mismatch for example will cause the radius of the circle to deviate from the programmed circle.
By comparing the circular path programmed into the machine with the actual path measured by the ballbar, U-MACHINE was then able to obtain a clear measure of the used machine tool's condition and contouring performance. At the same time, U-MACHINE also gained enhanced diagnostic capabilities with which to identify and remedy any sources of machine errors before sale.
The heart of the solution is the ballbar itself, a high accuracy, telescoping linear sensor with precision balls at each end. When in use the balls are kinematically located between precision magnetic cups, one attached to the machine table and the other to the machine spindle or spindle housing. This arrangement enables the ballbar to measure minute variations in radius as the machine follows a programmed circular path.
The data collected by the Ballbar 20 software is used to calculate overall measures of positioning accuracy (circularity, circular deviation) in accordance with international standards (ISO 230-4 and ANSI/ASME B5.54). Data is recorded and displayed both graphically and in numeric format to aid faster machine tool error diagnosis.
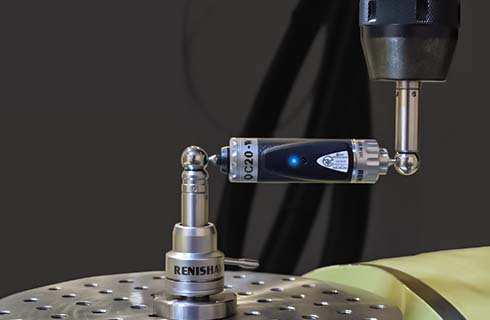
Renishaw QC20-W ballbar system performing a test
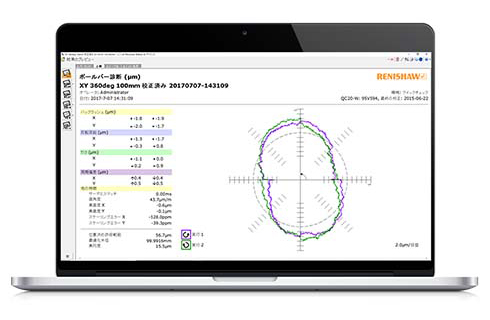
Ballbar 20 diagnostic software
Results
Using Renishaw's QC20-W ballbar system, U-MACHINE is now able to complement its static accuracy measurements with comprehensive dynamic accuracy measurements that provide customers with increased assurance in making used machine tool purchases.
Being seen to have taken a market lead on used machine tool accuracy measurement, U-MACHINE has experienced a steady increase in customer confidence and enquiries, mirrored by a 15% recorded increase in used machine tool sales. The consequent positive impact this has had on the U-MACHINE brand and market position has enabled the company to reach and proactively engage with a greater number of large corporation machine tool users.
CNC machine tool precision diagnosis using the QC20-W ballbar typically takes U-MACHINE just 10 minutes. Since specific error sources are identified in the order of their impact on accuracy, any necessary remedial repairs are more effectively prioritised with a consequent reduction in engineering time and cost. The increased level of traceability afforded to customers by the additional circularity measurement data has proved popular with customers, giving them an objective and more intuitive view of pre-owned machine tool precision prior to purchase.
