Navigation
Managing the process
A performance guarantee

Renishaw believes that CMM retrofit customers have the right to expect the same level of professionalism and quality from a CMM upgrade as they get when they buy a new CMM. Its retrofit service is designed to deliver just that. The first step is a rigorous machine survey designed to assess the mechanical and electrical components of each CMM. Combined with Renishaw's extensive experience with all brands of CMMs, this enables Renishaw to commit to a level of system performance. You will know exactly what to expect from your upgraded CMM before you make any commitment.
Renishaw staff perform an extensive survey to determine the status of all performance critical CMM components. This rigorous approach ensures that the proposed solution will reliably meet your requirements.
‘Plug and play' installation
Renishaw has built up a comprehensive knowledge base of CMM installations, so it can provide a ‘plug and play' solution using its UCC universal CMM controller for most models of CMM.
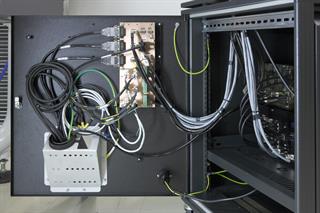
Renishaw has developed a range of interface panels for common CMMs, enabling the existing ‘umbilical' cable to be plugged straight into UCC controller cabinet, saving many hours of on-site rewiring.
Certified calibration
Renishaw is accredited by both UKAS and A2LA to ISO 17025 for the calibration of CMMs to ISO 10360-2, giving customers confidence in the accuracy of their system.
System installation
Renishaw has developed sequence based software (UCCassist-2) that controls the installation to ensure that all installations are completed in a consistent manner. The sequences ensure that machine calibration is completed in accordance with our accredited process.
GMEC - Error map

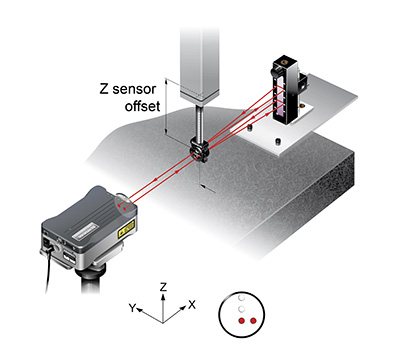
The geometric machine error compensation model includes 18 compensation functions, 3 squareness errors and compensation for horizontal arm and large dual drive machines. The error map data software utilises devices such as the Renishaw XL80 laser, electronic levels, Renishaw machine checking gauge (MCG), straight edge and gauge blocks.
The GMEC calculator is a powerful tool for analysis - it has the ability to analyse data collected with many devices, in any location or orientation, within the working volume. Data sets can be stitched together in the event that the CMM axis is longer than the capability of the device, determining the full axis error. Furthermore, it can identify and analyse redundant, bad or inconsistent data.
With the integration of the MCG and the ISO10360 gauge block test within the GMEC calculator, the existing error compensation can be updated by analysing the data collected. This ensures optimal metrology performance is achieved.